











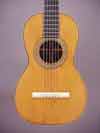
This old fellow sounds terrific, too.

Please click on the small images to see the large views.
Page 2 of 2
 |
After gluing my patch in place, I finished it down with my small finger plane, checking to make sure the final dimension was the same as the original thickness. |
 |
Hide glue is especially important in this application, because it has absolutely no tendency to "creep" or slide under high stress, even when heated. One thing for sure, there's plenty of stress around the bridge on a guitar! A you can see, the result was a nice flat surface for regluing the original bridge. Even though I added new wood, it wouldn't show under the bridge. |
 |
Next I scrubbed the top cracks with more deionized water to clean them as best I could. Gluing and clamping the cracks was easy, what with the back removed! |
 |
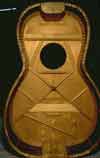
Over each of the cracks, I positioned and glued diamond shaped patches, the same size and shape as the original top joint reinforcing diamonds. Any shape patches would work, but I thought it was nice to match Martin's style while I was at it. . . |
 |
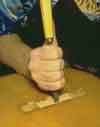
Then, with the bent chisel, I carved each patch down to a "feather edge" Patches with tapered edges are just as strong, and are lighter. Additionally, they won't spring loose if the top is flexed in that area. |
 |
The original pencil marks were still visible for me to align the new bridge plate. I made my new bridge plate the same dimension as the original. No need for an oversize bridge plate because I'd already rebuilt the spruce in the area, so it was strong as new. |
 |
I clamped the bridge plate, as I clamped everything inside the top, up against a heavy flat plate to keep the top flat as possible during the rebuilding. |
 |
A final sanding of my new interior parts. |
 |
And a quick brush with some strong tea. I'm not trying to hide the repair, but simply cut down the brilliant white glare of the new spruce parts. |
 |
Here's the completed repair from the inside. I thought about it for a while, but finally decided to install the bridge plate in the original position, using the original pencil marks, even though it's a bit crooked. |
 |
I really love these little one-handed clamps. They make regluing backs a lot more fun! |
 |
I used my little chisel to clean up the glue squeeze-out. |
 |
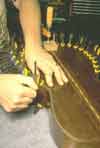
I reglued the binding with hide glue, too. |
 |
All over the top there were these little black dings, places where the finish had been broken and dirt had gotten rubbed in. I carefully picked the dirt out of the worst of them, about a hundred or so. |
 |
I scuff sanded the top with 220 grit paper, and brushed on a thin coat of shellac. On the following days, I French polished the top to add a bit of thickness to the finish, and to brighten things up a bit. |
 |
The finish looks far from perfect, but I think it looks "well attended-to." |
 |
I removed the masking tape over the bridge area, |
 |
Positioned and Scribed around the bridge, |
 |
And scraped the gluing surface clean. |
 |
I used hide glue for the bridge, too. It sticks reasonably well to almost any clean surface, and works well with ivory. |
 |
Notice my little clamping caul. It delivers pressure to the edges of the bridge to make sure that they will be glued flat to the top. Ivory doesn't, but some wood bridges tend to curl up a bit as a result of water absorption during the gluing process. |
 |
The masking came off the fingerboard gluing area. |
 |
I undercut the "cheeks" of the heel dovetail and used my sharpest chisel to fit the joint. |
 |
Naturally, the neck needed to be reset to the correct angle after all these years. |
 |
I have a caul that fits over the frets, so I don't press them down into the fingerboard when I clamp the neck back in place. |
 |
Here's the heel, all fitted and glued up. |
 |
Time to tap the fifteenth fret back in place. |
 |
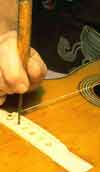
And time to tap all the frets level with my little steel plate. |
 |
A quick leveling of the frets, |
 |
A bit of rounding, |
 |
And polishing. Check out neck resetting and "bar fret" refretting if you'd like more about these processes. |
 |
The final setup: cleaning out the glue, and notching the top and bridge plate to match the bridge. I restrung with compound silk and steel strings, for the steel string sound with reasonably low tension. |
 |
Here's the top, six months after the job was done. Looks just like a new guitar. Nice and flat, solid and straight. |
 |
With all the damage this guitar had seen in recent years, we're lucky that all the ivory parts were present and intact. I must admit, though, that one of my very favorite jobs is carving Martin style ivory bridges. Thankfully, we still have antique ivory available (not cheap!) for such restorations. |
 |
Overall the guitar looks good again, and I suspect it's ready for
another lifetime's service. This old fellow sounds terrific, too. |
 |
A final ego piece - a little label, printed backwards. I really appreciate repair labels when I encounter them. . . |
1
2