Page 2 of 2
The repair is really quite simple. You just get some glue under the loose brace,
and clamp it up.
Like so many other jobs, the Devil is in the details.
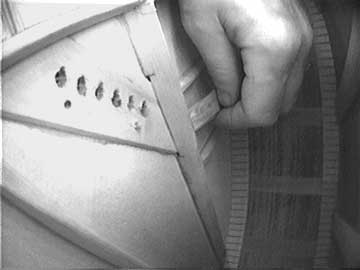
First I'll work some glue under the brace using my shortened palette knife:

It's not hard to get some glue in there, but it's impossible not to smear it around
the top area. I can use damp rags to wipe the excess off so the job will look neat
after it's done.
Now's a good time to take a look at that mortised bridge plate. Notice also, there
are two old screw holes from a previous "repair" to an older loose bridge.
That's another good sign there was heat damage. The previous repairman was obviously
not sophisticated, and probably didn't notice the loose brace. Left unattended this
kind of looseness can compromise the life span of the guitar top.
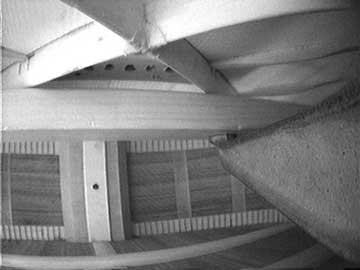
Once I have my glue in there, it's not too difficult to clamp the brace:

I'm using a ten inch long piece of redwood with a cork facing to press up against
the brace. The soft facing keeps me from denting the brace, and the extra length
allows me to balance against the opposite cross brace, so the clamp doesn't have
to balance precariously on a skinny brace. I'm using a heavy clamp and squeezing
the brace pretty hard to really flatten out the top in the area of looseness.
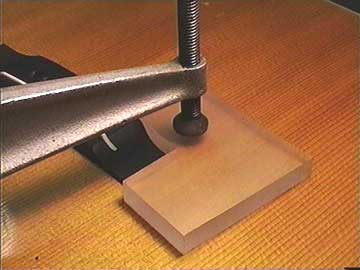
To help flatten the top, I'm using a very heavy 1/2" thick acrylic caul:

I have the caul cut to fit around the bridge so that I'll get great distribution
of clamping pressure. The polished acrylic surface guarantees that I won't mar the
finish, and the extra width keeps me from pressing in a telltale crease in the spruce.
Ideally, I'd be doing this job with a really big flat caul on top, with the bridge
off (before regluing it.) In this case a previous repairer reglued the bridge first,
but sometimes the bridge stays glued down while the brace becomes loose in the stress
of excess heat. Either way, I'll glue the brace back without removing the bridge.
I looked inside after trial clamping, and found that I wasn't getting quite enough
clamping pressure directly under the bridge, so I changed the setup just a bit:
Thist time I have two clamps, one right on top of the bridge. One clamp or two,
the choice is a matter of getting clamping pressure where it's needed. If the bridge
is directly over the area of looseness, then two clamps usually make the most sense.
I'm not showing the "after" photo, because it just looks like a regular
guitar, and you can't see anything special.
1
2
Back to Index Page


