Banjo Fifth String Capo
© Frank Ford, 5/8/98; Photos by FF, 5/8/98
Nothing beats the Shubb fifth string capo for all around utility. Some players still feel it's a bit too obtrusive, so they use little "spikes" in place of the adjustable capo. With either system, the simple goal is to clamp the fifth string down to raise it to correspond to the position of a capo on the neck.
Here's how I go about installing this simple device.
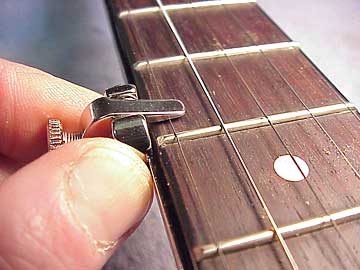
First, I'll hold the capo bar in position at the edge of the fingerboard with its finger lowered, to simulate the action of the mounted capo:

Because the edges of banjo necks are rounded, and not all the same, it's a good idea to get a clear idea of how high to mount the bar at the edge of the fingerboard. Generally it works out to about 1/16" lower than the surface, but it pays to check to make sure. The idea is to have the bottom surface of the lever parallel to the surface of the fingerboard as the string is held against the fret.
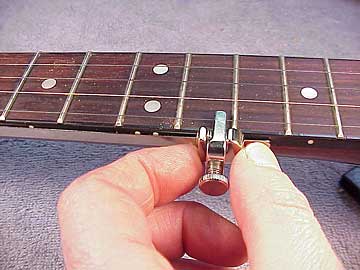
Next, I'll figure out the lateral position:

I want to make sure that the bar is close enough to the fifth fret so that the lever will be able to work easily at the sixth fret, which is the lowest fret position in which it will be used.
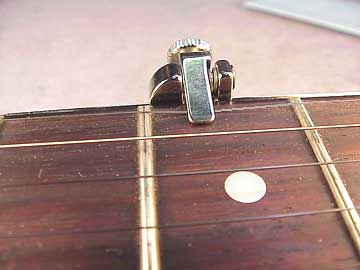
I'll also look closely at the position of the fifth in relation to the edge of the fingerboard and the end of the capo lever. If it's too far "inboard" the string will squirt right out from under the lever when it is lowered. If necessary, I'll remove the fifth nut, inlay a small piece of wood in the hole, and replace the nut with a "spike." Check out the fifth nut article for a picture of the little spike.
At the other end, I like to make sure it will work at the highest logical fret:

These capos are available in two different lengths, although most players prefer the longer one so they can reach higher frets.
Once I establish the location of the bar drill a small pilot hole for the screw and screw it in. (Rick Shubb, the maufacturer, recommends a #55 drill bit.) Then, I drill and install the remaining screws right through the bar, so I don't have to worry about aligning the screw holes:

I'll check the fifth nut, to make sure that it's cut low enough for the string to bear down firmly against the fifth fret:

Notice the location of the capo mounting screw. I don't want it to land directly under the fifth nut or fifth fret, because it could raise either the nut or the fret when it's screwed in.
If the nut isn't cut low enough, I take my smallest X-acto saw and cut it so the string bears well:

That's pretty much it. The capo is in position, and it should do its job well.
Here's how it's used.
In the "neutral" position, the capo is stored right at the end of the bar up near the fifth fret, with the lever raised just enough to clear the string:

To engage the capo you simply slide the clamp up behind the fret and tighten the screw to lower the lever and hold the string against the fret:

Unlike a regular capo, the fifth capo can be placed extremely close to the fret, and works better in that position. Right up against the back of the fret, the capo can clamp the string firmly without stretching the string. Remember to pluck the fifth string as you tighten the capo, and it will be easy to get just enough pressure to hold the string down without straining the system!
Place the capo too far behind the fret and screw it down tight, and you'll stretch the string so much you'll be sure to have to retune:
