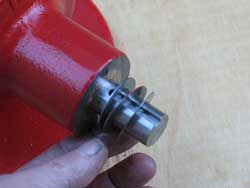
I used my Erickson collet holder to grip the drill bit and drilled the set screw hole:
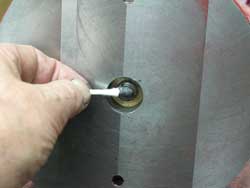
Same setup to tap the hole under power for a set screw using a long 1/4-20 tap:
Here's the finished pulley:
The final casting is the table.
And this photo is the only one I "dummied" up. I took the table casting to TechShop and mounted it in the 15" Clausing lathe:
The lathe is big enough that I actually stand my tripod right in the chip pan to take photos. Unfortunately, it looks like I might have bumped it or forgotten to set the focus. As you can see, the table is painted at this point.
At any rate, I faced the table, and drilled it through center.
Back in my shop, I countersunk the hole from the back side:
Then, I milled the table support bosses flat:
While still having center registered on my DRO, I went to the outside of each boss and touched a 1/4" mill to scar the surface right on the centerline of the table and its hole:
Then I could setup my angle block on the vise, and drill each of the mounting holes directly on center and at the same height from the surface of the table:
The boss is just far enough down from the edge of the table that I had to use a tap extender to reach it:
The table support brackets are simple pieces of 1" X 1/2" cold rolled steel. I drilled each end for 3/8" cap screws.
I keep a small rotary table mounted on my small Rusnok mill most of the time, just for little jobs like this one. Some time ago, I'd made up an eight-inch diameter tooling plate and set it up on the six-inch table. I milled the center hole in place, so I know it's accurate, and I threaded the bottom to accept simple tooling. In this case, it's a plug that's 3/8" diameter on top to fit my table support brackets:
The bracket plugs right onto the center:
And, I was able to bolt the support bracket at both ends to hold it securely. A quick trip around with a roughing end mill and I had the ends rounded off neatly:
Over at the drill press, I countersunk the support brackets for their mounting screws:
Here's a quick shot of the major pieces, ready for assembly:
In went the crankshaft:
And the bronze slider:
The yoke:
And the file rod:
There was just an eeny bit more lateral movement in the drive shaft than I thought I'd like, so I went over to the lathe and turned out a series of thin spacer washers, from about .005" to .020".
After finding just the right one to get the rig running tight and smooth, I stashed the spares on the other end of the drive shaft, behind the pulley. That way, if I ever needed one to compensate for wear, I couldn't avoid being able to find it:

The bottom of the casting needed a plug to keep all that nice oil in there,
so I made one from a piece of steel:

I swabbed the surface with some super high pressure nickel grease because I'd
made a tight press fit:

Here's the cap"

A couple of swats with a plastic hammer got it started:

But I had to clunk it hard to slam it in flush:

That aluminum plate kept me from scarring the bottom of the casting:
The upper cap got a little felt washer to keep out chips and dirt:
I screwed it down tightly with the six 4-40 cap screws:
And here's the little bugger, ready for action:
I looked all around for a small motor to drive the thing, and finally settled on dismembering a cheap pressure washer I'd bought from Harbor Freight. The stupid thing started acting up after only a couple of uses, and it became obvious I'd never use read full article it again. I salvaged the motor, and, after only a couple dozen hours of fiddling, I was able to mount the thing, paint it red, and get this project finished:
Update, 10/30/07:
I finally put the filer to work.
My first little project was to make a new pair of latches for a vintage 1867 Martin guitar case:
I just broke off a 1/4" diameter chainsaw file and stuck it in the holder, with the teeth pointing downward. It made quick work of cleaning up the curvy contour, working right up to my scribed line:
I was pleasantly surprised at how easy it is to hold the part down by hand.
Not having a square file with a 1/4" shank, I thought I'd try my hand at actually making one, so I turned down the end of a 1/4" square piece of W-1 tool steel:
Using a plain old cheap wood chisel, I whacked a bunch of teeth in my file blank:
Not too neat to look at, but these teeth are pretty sharp:
After heating to bright cherry red and plunging it in water, I mounted my file, and found that it didn't work as well as the chainsaw file, but it cut quickly and easily enough:
Here's another little job. It's a replacement ivory button for the tuning machine of the guitar that fits in that 1867 case:
As before, I made the little file to fit the job, and it took less time to make the file AND square up this hole than it would have for me to have filed the hole by hand: