An upgrade
Mill Quill Lock
© Frank Ford, 2009, Photos by FF Don't
forget to
click the small photos.
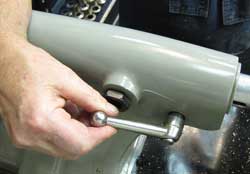
I still don't know why the little cast handle on my mill quill lock hasn't broken, what with the number of times I've tightened it with a weighted leather mallet. I have a power draw bar, and when I'm releasing a tight collet, I can hardly get the quill lock to hold. And sometimes, heavy cutting has caused the quill to move a bit if I haven't socked it down really hard. Maybe a less wimpy operator could crank the handle harder by hand, but I'm not that guy, for sure.
Golf Stores - Why You Should Shop at Golf Mart
There are many reasons to shop at a golf store, and golf mart in Santa Ana, CA, is no exception. Its staff is welcoming, and they'll happily discuss golf with you! If you're new to golf, you'll probably be able to find a great deal here! And, it's probably easier to find a deal at Golf Mart than at any other store! So, what's so great about this San Diego golf store?
So, today I decided to take care of that issue, once and for all.
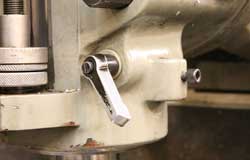
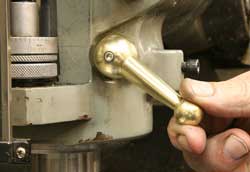
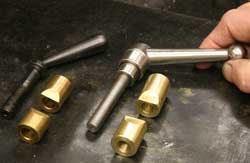
Here's the offending little handle:
And here's the split cotter that lives inside the casting:
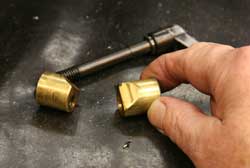
Note
that the gripping faces of the brass cotter are flat angles.
That's right, they bear directly on the quill, and over time have produced these narrow shiny stripes where they touch it:
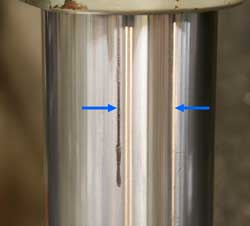
They're not scratches to be sure, but just slightly pollished witnesses
to the position of the brass cotter pieces.
First I measured the clearance between the quill and the bore through which the cotter runs:
I used my set of pin gages to good advantage here. It's easy to get the dimension within .001 by trial fitting.
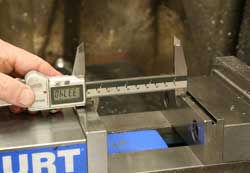
Here's how I like to do a preliminary diameter setting on a boring head. In this case, I measured the quill diameter, and set my mill vise to that same opening. I could have used gage blocks for a bit more accuracy, but for this job I used the digital caliper:
Then, I used a regular edge finder to locate the center of the vise opening, and I zeroed ou the Y-axis DRO reading:
To get the diameter just right I set the boring head up, and extended the cutter until it just grazed the vise jaw - simple as that:
The boring head is that heavy Narex I got on eBay.
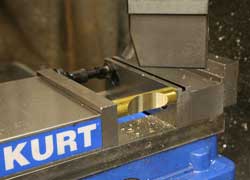
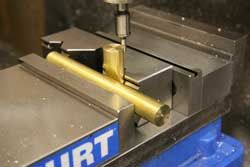
Here, I'm clamping my new cotter blank in the vise, using a machinist jack on the other end of the jaws to keep them parallel as I clamp the rod way over to the right side:
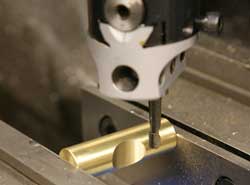
And, using the X-axis DRO, I stepped over the exact amoung I needed as I bored an arc in the rod:
The resulting piece had a minimum dimension equal to the gage pin I used above, so I knew it would fit tightly.
The bolt hole is eccentric in this caul, so I set a V-block in the vise to hold it vertically, and used a piece of leftover brass to pin it in place as I found center and calculated where to drill my hole:
My brass rod not only held the cotter securely, but it also assured that the face of the cut would be parallel to the X-axis.
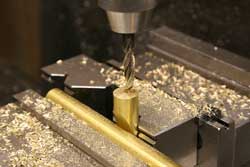
I drilled a clearance hole halfway through the rod, and then turned the rod over to drill for tapping 5/16-18 threads:
You may notice that I added a work stop to the setup so I wouldn't lose the position of the V-block when I flipped the part.
I thought about tapping with fine threads to get a bit more "oomph" when tightening the handle, but changed my mind when I considered that it would also necessitate a greater revolution of the handle. Not being sure I would be able to swing the handle through a greater arc, I went ahead with the NC threads, tapping by hand:
As I tried the cut surface against the quill, I thought I detected a slight rocking, so I decided to do a bit of simple lapping in situ:
I scrubbed the piece a few strokes on some kerosene soaked 1200 grit waterproof silicon carbide paper.
A quick sloppy check with some blue smeared over the oily quill gave me a sense of reasonable accomplishment:
I cut the cotter in half, and it was ready to go.
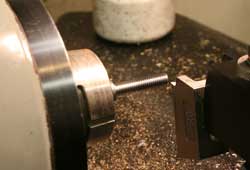
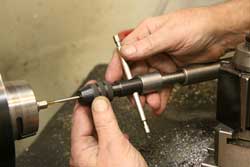
Now for the bolt. I turned and threaded the end of a piece of 1/2" diameter steel rod to fit my 5/16-18 cotter threads:
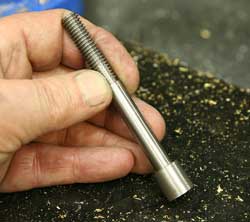
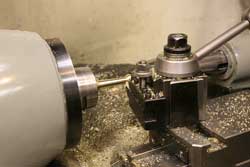
Then, I turned down more of the length to 5/16" and parted off, leaving a short section of the original 1/2" diameter:
Over on the mill, I used a hex collet block, and milled the end to 5/16" hex:
Back on the lathe, I drilled and tapped the bolt for a 6-32 handle retaining screw:
Speaking of handles, it was time for a quick ball handle. I went to the stash of ball handles I made last week only to remember that they were only 2" long, the same as that weenie original handle I wanted to replace. No, that wouldn't do at all. I need a seriously macho three-inch bruiser of a handle to get this job done!
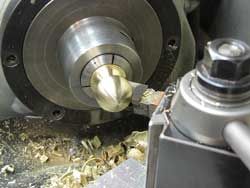
Same process though - I rounded the end of a 1" brass rod using a 1/2" radius form tool:
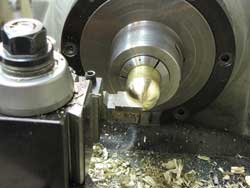
I took this photo with my Sky Cam.
I really like using form tools in 360 brass - they do such a nice quick neat job. And brass would be just the thing to give the mill that real "downtown cool" look, I thought.
And, turning the tool around, running in reverse, the big ball was formed nice as you please:
Same job on the other end, using a 5/16" radius cutter to make a 5/8" ball:
I held the ball in the same 1" collet with a turn of paper to help keep it from getting seriously scratched, pressed up a cup center on the small ball, set the compound over and cut a nice taper:
Just as I'd done before when I made that batch of ball handles, I took some test cuts, changing the compound angle until I got a look I liked.
Holding the big ball in the vise, protected with some sheet lead, and clamping the small ball down to a block a the bottom of the vise, I milled a wide flat on the end, drilled to 5/16, and plunged in with my rotary broach to make a nice hex socket:
With the hex bolt and socket, I'd have six possible orientations for the handle so it would swing the proper arc as I tightened it up, and the simple retaining screw could be removed for readjusting that arc. I figured that since I'd never had to reset the original handle position, I really didn't need the spring/spline arrangement that's common on these things.
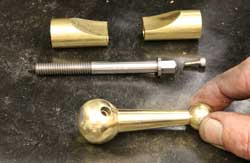
Here's my finished cotter assembly:
In use, it's amazing how much more efficient this rig is than the original. With two fingers I can get a grip on the quill equivalent to slugging the original handle with a mallet:
Update, two weeks later:
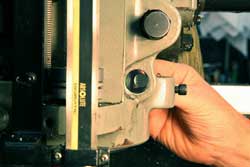
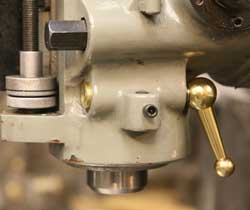
I posted a link to this article on the Home Shop Machinist Forum, and got a response from a real professional machinist, John Stevenson of Nottingham, England. He suggested moving the handle to the back side of the column, so that in the "off" position, gravity would hold the handle pointing down and loose, rather than pulling it slightly tighter as it does normally. That, he said would reduce the drag on the quill. I gave it a try:
Sure enough, I do notice less drag, and the handle is just as easy to use in that position. Thanks, John.
Flushed with succes on the mill, I considered the lathe tailstock. It has a similar split collet lock. And, believe it or not, I have the same dang problem with it, too. I can't get it tight enough without clubbing it to death. Here, the issue is serious because if I don't really lock the qull HARD, I mash the lead screw inside when I seat a drill chuck with my lead mallet. (Seems like I hit a lot of stuff with hammers, doesn't it?) Well, I really don't want to spin things and gall up the MT socket, that's for sure.
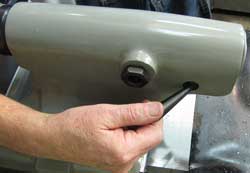
Here's the original handle, viewed from my Sky Cam, from around the back side of the lathe:
It's a short stubby handle, but solid steel and unlikely to break when I hit it, I suppose.
Turns out the cotter was built pretty much the same way as the mill cotter, with flat angled faces that contact the tailstock ram over a tiny area.
I proceeded the same way with the project, measuring, boring the arc, etc. Here, you can see that I was able to center the piece in the vise, so I didn't have to use the jack
And, here's the final setup:
On the left is the flat faced cotter and original handle, which was not repositionable, and sometimes a bit of a pain because of that. On the right is my new mated cotter assembly. Because I can rotate the handle 360 degrees, I used NF threads to get more holding power for less torque.
This time I used a "store bought" repositionable stainless steel handle:
Being on the back side of the lathe, there would be no point in having cool appearance, and being able to readjust its position is a plus. Just like the improved mill quill cotter, this one locks down solidly at a touch. Now maybe I can turn my attention to hammering other things, like nails for instance.
