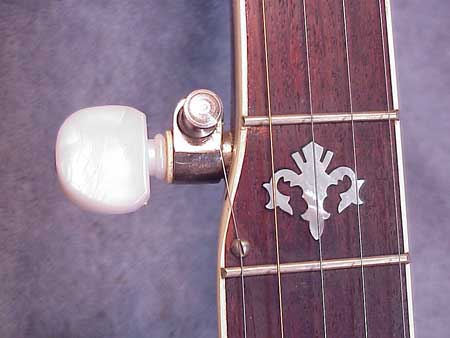
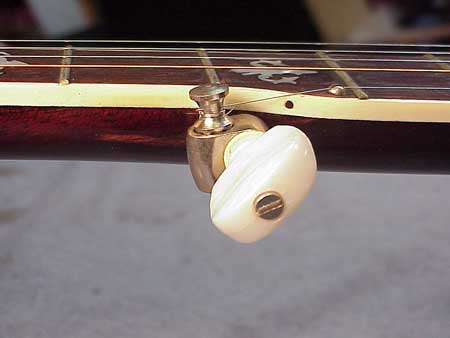
Geared 5th String Peg
© Frank Ford, 7/3/00; Photos by FF, 7/2/00
Here's the problem, right enough:

It's that damn friction fifth peg so often supplied on inexpensive banjos. The friction peg must be tight enough to hold the tension of the string tuned to pitch, and at that tension, often it jams, sticks or is just difficult to tune accurately. It was, of course, standard equipment on old instruments, too. These days, though, a nice 12:1 geared peg is available, which makes life much easier for banjo players. With a geared peg, string breakage is greatly reduced, and tuning the fifth string is about as easy as tuning the other four.
The first thing is to get the old one out. I start by wiggling it to see if it's loose, because it's usually a friction fit in a tapered hole, and I should be able to pull it right out. Usually, though, it takes some persuading.
I'll push it hard from side to side, in a direct line with the grain of the neck, my thumbs on opposite sides so I have good control:

If that doesn't loosen it, I'll reach for a little more power in the form of my plastic hammer:
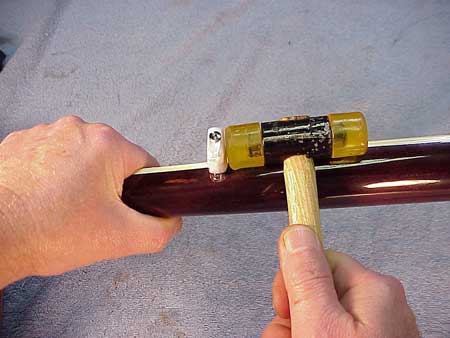
Always, though, tapping only in direct line with the grain of the neck. If I were to apply force perpendicular to the fingerboard, I'd be likely to split the neck because the peg is forced into a mighty big hole in a thin section of the neck.
Once I get it to wiggle ever so slightly, I'll pull it out, carefully watching for any chips that might form at the surface as I pull:
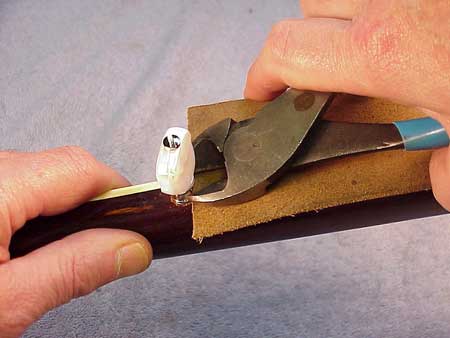
Using the leverage of my diagonal cutters and protecting the neck with a scrap of leather or soft wood, I can generate a lot of controlled power to pull the peg out.
If it is glued in place (some are) I'm not above heating it quite hot to release the glue:
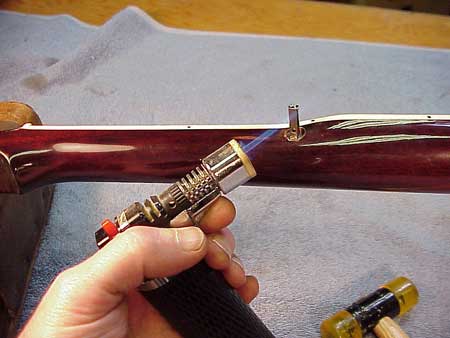
With the plastic button removed I can easily heat it to break down any glue. Also, the hot peg will tend to sear the wood just a bit, lubricating its way out.
Some older geared pegs are actually screwed in place, and they simply require unscrewing, but otherwise their replacement goes along just the same. Here's view of both types of friction fifth pegs:

Frequently the new geared peg requires a slightly larger tapered hole, for which there is a simple customized tool that most banjo mechanics use:
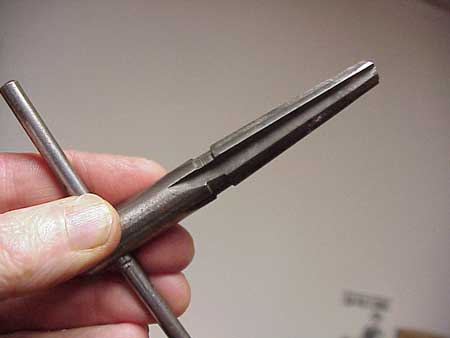
It's just a regular hardware store repairman's reamer with the end chopped off at the point where it's the same diameter as the small end of the geared peg.
Personally, I like this Sears 3/8" reamer that's mounted in a screwdriver type handle:
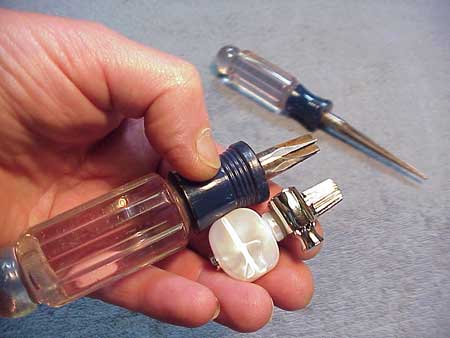
The taper is about the same, but I find it easier to control the alignment. I cut its end off with the little carbide cutoff wheel chucked in my Dremel tool. The reamer is not exactly the same taper as the peg, but it's close enough that nobody has actually made a specialized tool for this use. (Stewart-MacDonald will sell you a cut off reamer if you don't want to make your own.)
After a turn or two with the reamer, I'll have the hole fitting the peg well"

A couple of smart blows with that plastic mallet and the peg seats nicely:
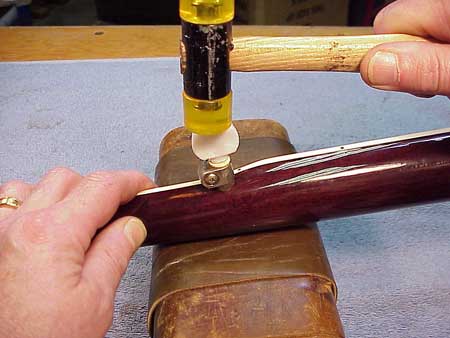
Another time to exercise a bit of judgment and caution, because it's always possible to split the neck!
