OK, same for the bridge. I scrape off the old glue residue, and expose a fresh smooth gluing surface:

Time to clamp up.
Here are my favorite bridge clamping cauls:

The one I'm holding has a flat ebony top and a thick shoe leather curved bottom which roughly corresponds to the top surface of the bridge. The smaller square ones are for the bridge tips and they have 1/2" holes drilled in the center of the fact that contacts the bridge. That way, clamping pressure is distributed right to the edges, and there's no tendency for the bridge tips to curl away from the guitar top.
I've threaded the lower jaw of my big C-clamp to accept a variety of 1/2" thick aluminum cauls, each of which matches a common bridge plate:

These aluminum cauls are easy to make because you can cut aluminum on a band saw with the same blade and speed that you use for wood.
Laying the bridge in position, I mark the ends and one edge with two layers of masking tape:

That way, when I'm hustling to get the bridge glued on, I can just slide it into exact position and I won't be confused by trying to see through the glue squeeze-out.
To keep the joint warm during clamping, I pop the bridge into the microwave for a few seconds to bring the temperature up to about 150 degrees:

This isn't dangerous as long as the heat is not prolonged, or elevated too high.
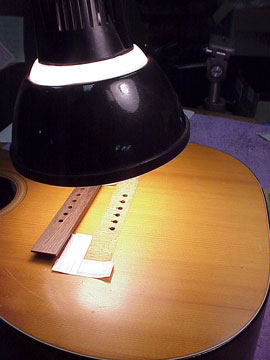
Sometimes, I'll warm both the top and the bridge with my regular desk lamp and its 75 watt bulb:

I don't like heat lamps, and find them a bit difficult to control, so I hardly ever use mine.
More