Page 2 of 3
I happen to have a top which was removed from a similar vintage D-28. I used it as
the model for making the new bridge plate overlay, and as the model for this photograph:
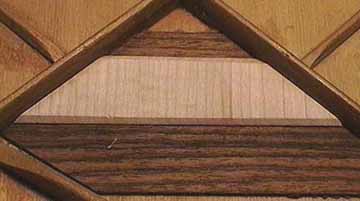
Here's that big rosewood bridge plate, with my maple overlay. My overlay is a bit
thinner, about 3/32" thick. The grain is vertical, and oriented the same as
the top grain. The overlay is wide enough to span across the holes and get a good
grip all under the area where the bridge sits.
The idea is to span the area with a stiffening plate overlay so it will be less like
likely to bend under the relentless pull of the strings. It's a long slow pull, and
I'll use hide glue to avoid any possibility of "creep." Even if it gets
warm, hide glue won't slide and allow parts to slip.
If I had my way, guitars would be made with bridge plate grain running parallel
to the top grain to avoid the chipping between holes, and the tendency to curl or
crack in the direction of the string pull.
Holding the overlay inside, I'll mark the string hole location.
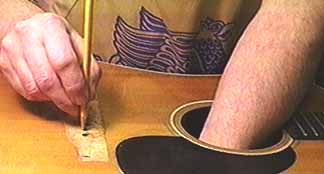
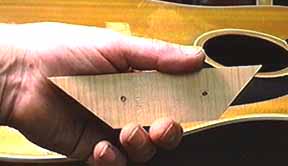
I'll adjust the size of the overlay until I have the holes lined up where I want
them. In this case I want them centered:
Because the surface under the bridge isn't as flat as it might be, I'll need to think
about what I'm doing when I clamp the overlay. I'll use a resilient caul inside and
press the whole business upward to a rigid outer caul. Then, any deformation caused
by clamping pressure will push the top surface toward an even better contact with
my new bridge.
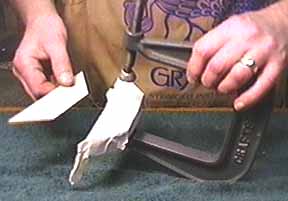
I'm screwing the heavy aluminum caul to the bottom of my biggest bridge clamp. I'll
use the cork pad and cover the whole business with masking tape so the cork can't
get stuck to the glue squeeze-out from the overlay.
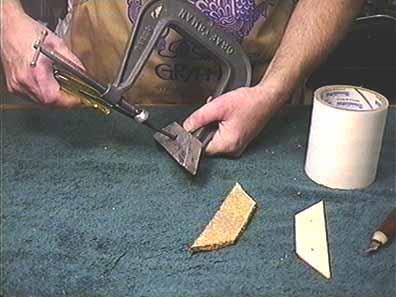
Wrapped, and ready to go:
More
1
2
3
Back to Index Page