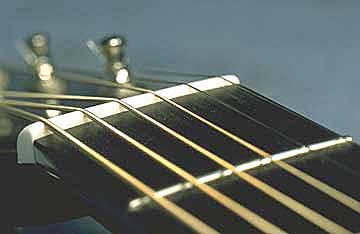
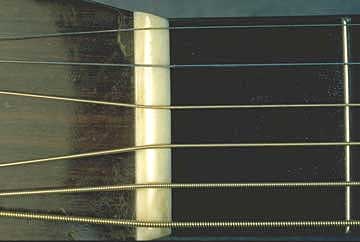
Once I have the pencil lines where I want them, I'll make a tiny little notch in the center of each one:
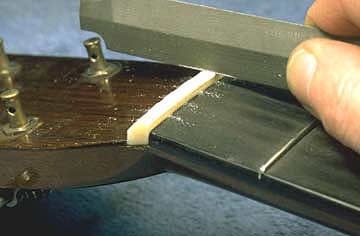
I'm using my sharpest file, and making just enough of a notch to balance the string in position so I can string the guitar and tune up.
With the guitar strung and tuned, I can now notch each string to the proper height, using an assortment of round edge nut files:
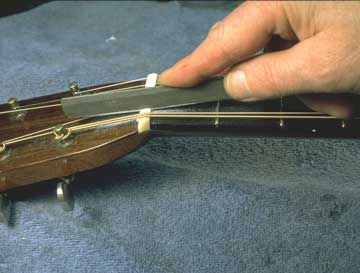
Look how I'm holding the file. I file the string slot at an angle that's halfway between the plane of the fingerboard and that of the peghead. That way, the string will rest in the entire length of the nut, and will bear right at the front edge as it exits toward the bridge. This is important stuff, because the string would buzz and play out of tune if it didn't bear on the front edge of the nut. I want the string to bear evenly through the length of the slot so that the nut won't wear out prematurely from friction as the string is tuned.
The shape of bottom of the slot is important, too. It should be rounded like the cross section of the string, and just wide enough so the string draws through it smoothly. If the slot were too tight, or V-shaped, the string would be pinched, tuning would be a nightmare, and the nut would wear out quickly.
Now, with all that in mind, I have a great opportunity to "dial in" the lateral positions of the strings as I file the nut notches to their optimum depth. Especially with the bass strings, I can rock the file to the side to allow the strings to settle in just the right positions. That's why my original notches were so tiny before I strung up the guitar.
OK, let's get back to work.
I keep the guitar tuned to pitch as I work, and I just lift each string out of its notch and let it slip aside so I can file its slot:

In order to get the height of each string slot just right, I need to check my progress often. I do that by mashing the string down between the second and third frets. Then I look closely under the string at the first fret to check its clearance:
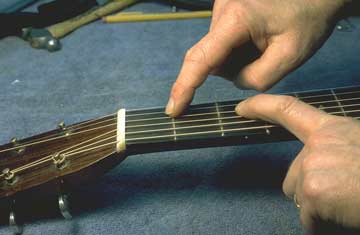
Tuned to pitch, the string strikes a straight line from the nut, over the first fret, right to the second. I keep on filing the slot lower until the string just barely clears the first fret.
Here's my nut all set up:
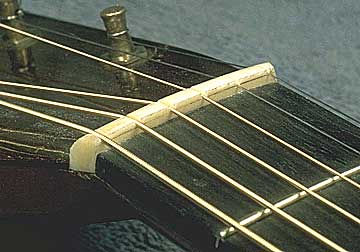
The sides, bottom, and ends are fitted, and the string height is just right. Now all that's left is to make it look nice.
Working by hand, I'll smooth out my file and sanding marks using successively finer grits of sandpaper:

I'm also cutting the top of the nut profile lower, so that the strings won't appear "buried" in their slots. Most luthiers agree that the best looking nut has a portion of the string protruding above the height of the nut material. By filing the slots to the correct depth first, I have no problem in achieving the ideal finished look.
In the photo above, I'm using Micro Mesh abrasive cloth to polish the nut to a high shine, but I could also use my buffing wheel:
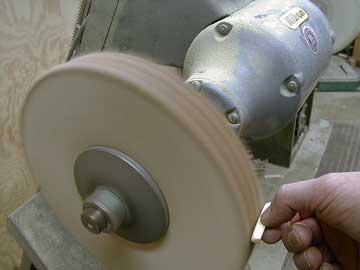
I try not to use power buffing to smooth out heavy scratches, because the wheel will tend to round the upper corners of the slots. It does a great job as a final finishing step though.
Well, done at last:
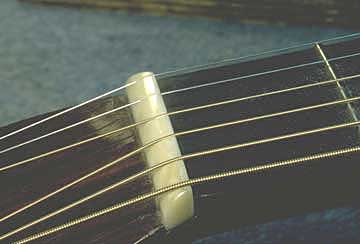
I have a nice shine here, and the strings fit just the way I like 'em. The wound strings stick up about 1/3, and the two steel strings sit just below the surface. I try not to let the unwound strings ride too high above the surface because they can sometimes jump out of their little notches if a capo gets pulled off center a bit.
Here are a couple more shots of the finished product:
