Sanding Blocks
© Frank Ford, 12/5/99; Photos by FF, 11/20/99
I have a lot of prejudices. After all these years, I'm kinda stuck in my ways, so even though I try to keep learning, I still fall back into old habits. Some years ago I bought a roll of self stick sandpaper, the kind lots of guys use for block sanding by hand. Sure enough, the stick-um dried out and the damn stuff is stuck to its backing sheet, because I never got the hang of using it.
I still like my same old sanding blocks, around which I hold pieces of regular low tech sandpaper. Actually, the sandpaper is the good, no-load variety, but just plain old "A" weight paper. I like the "A" weight because it's the thinnest and it conforms easily to my ever changing collection of blocks.
I think of sanding blocks in terms of their hardness, and I use all kinds of different materials to make sanding blocks. Soft, medium, hard, very hard - that's the way I think about them.
Let's start with the hard stuff first.
If you've read any of my material on fret work, you'll know about my favorite (and only) fingerboard sanding block, the #5 Stanley jack plane body. I use it occasionally for other sanding when I need a big flat block.
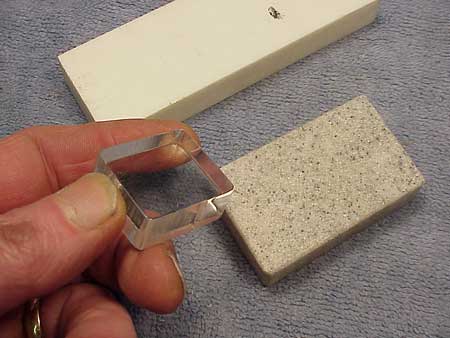
Here are a few very hard blocks:

They're synthetic - Corian and acrylic. I like these because they are very easy to maintain, and they retain their shape well. From time to time, I flatten them by rubbing them on some fine sandpaper on a flat plate, then buff them to "relieve" the corners.
Really hard, flat blocks are just the thing when I need to do a perfect, and very fine leveling job, particularly on finishes. Blocks this hard are difficult to use with really fine paper (over 1000 grit) because the tiniest particle of sanded finish, broken off grit, or room dust will get in between the sandpaper and the work, and will rub around and scratch the finish. In finish touchup, I use the very hard blocks when I need to level a little lump of finish without cutting into the surrounding area.
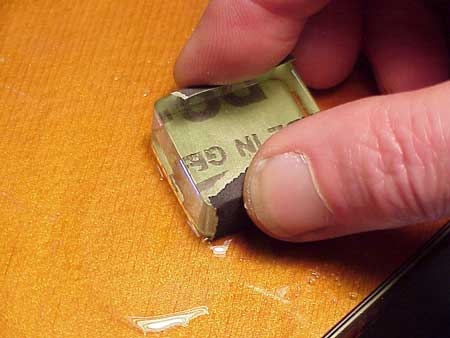
The more lubricant the better:

Kerosene works best to flow off the loose particles. Kerosene won't raise the grain as water will, particularly if the finish has a little check or other break.
We luthiers have to be particularly careful when sanding, because our work is right in front of our customer's face. Any deviation from flatness, squareness, regularity, curvature - every corner and edge - gets close inspection. So, we really need to use a sanding block for every stage of sanding on every surface. The more flat, square, or sharp-cornered the work, the more we need to use a hard block.
The simplest hard block is a flat piece of wood:

If I handle the sanding block carefully, I can sand edges like this without "rolling" over the corners, so I can maintain the regular flat shape of the edge. Once there's finish on the edges, I want them to look crisp and flat. That's pretty much true of all the various surfaces, so I'll use a hard block to obtain the shape I want.
In the photo above, I'm sanding end grain, so it really doesn't make much difference which direction I move the sandpaper. On most hardwoods, I'll make sure I sand with the grain as I finish up, so any residual sanding scratches will be obscured by the grain direction.
Spruce, however, needs special attention. Particularly when using coarse sandpaper, the grit tends to break off, and roll around in the soft grain areas if I'm sanding with the grain. So, I sand spruce mostly across the grain, either diagonally or perpendicular to the grain. That way, I cut both the hard grain lines and the soft material between them at the same rate. I can even finish up by sanding across the grain, and the sanding scratches won't show.
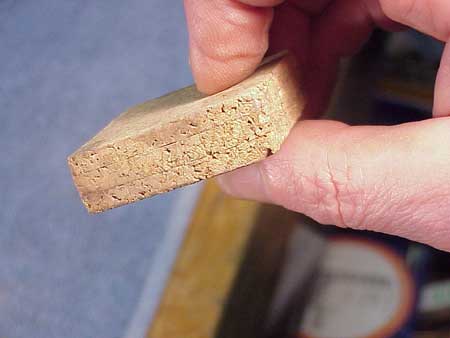
As I get to the final sanding I'll switch to a medium sanding block. No doubt about it, cork is the stuff for medium sanding blocks:

I buy the cheap cork they sell as a flooring product at home improvement centers. It runs about 1/4" thick. I laminate three layers with waterproof glue (so I can use them for wet sanding) and cut out my blocks as I need them. The very best feature of cork is that it takes almost no effort to shape into any contour.
To shape it, I simply rub the block on my marble plate to which I've clipped a piece of 120 grit paper:

I often use a stationery belt sander to rough the piece down, later truing it up on my plate. If I need a curved sanding block surface, I grab a sheet of 120 grit and wander around the shop till I find something with about the right contour to lay the paper against so I can form my block quickly. Sometimes, the instrument itself works perfectly. I can lay a sheet of 120 grit on the face of an archtop guitar, rub the cork block on the paper, and in seconds I'll have a perfectly mated sanding block.
A cork block will typically be my choice for final "pre-buff" sanding after I level a finish with a very hard acrylic block. I'll hit the lumpy finish with 600 grit on the hard block, then 1200 or even 2000 grit with a cork block. The finer I sand before buffing, the less heat I'll generate as I buff, and the less the finish will tend to shrink or deform. That's important, because finish touchups involve areas of different thickness, hardness and age of finish.
More