An elegant solution to a common problem
Nut Spacing Rule
© Frank Ford, 8/25/99; Photos by FF, 8/25/99
I learned this one from Kevin Ryan, a fine guitar maker and tool designer. Like so
many good tool ideas, this one is deceptively simple. I especially like it because
it will work with any instrument and any number of strings. I've seen lots of other
systems for laying out nut spacing, but nothing this versatile, simple and compact.
Kevin didn't tell me exactly how he made his nut spacing fixture, but I didn't have
any problem working out this method.
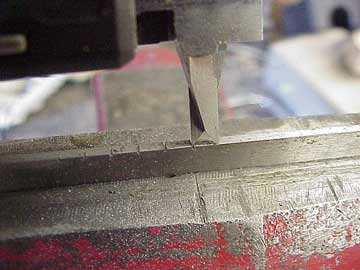
I took a 1/16" thick piece of ground tool steel and made a little cut on the
edge with my jeweler's saw and a #2/0 blade - the same setup I use for inlay cutting.
Then I set my caliper to 4.00 mm. Poking one blade of the caliper into the notch
I just cut, I was able to use the other blade as a guide to make another cut spaced
exactly 4.0 mm from the first one. Then I reset the caliper to 4.10mm, stuck the
blade into the second cut, and made a third cut, just 4.10 mm from the second. I
repeated these moves, increasing the spacing by 0.10 mm for each successive cut:
This steel stock is sold as "ground steel stock" in 18 inch lengths
by machine shop supply companies such as MSC (see my Sources
page) It's very handy stuff to have around the shop for simple tool making.

It took me about a half hour to make all the cuts I needed to go from 4.00 mm to
9.00 mm, or from much smaller spacing to much larger spacing than I'm ever likely
to need.
My choice of a 0.10 mm increment was strictly arbitrary. I was hoping to "split
the difference" between uniform and proportional nut spacing. Clearly, it would
be easy to make up different scales, using different spacing, say, .003" or
.005" or even more, especially for electric basses. A rule made with .001"
spacing could be used for a uniform layout, since the distance between the bass strings
would only increase by a negligible .005".
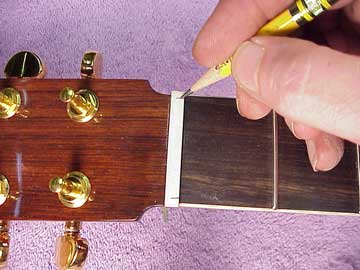
When I make a new nut, I simply mark the outside two slots in the
positions I want:
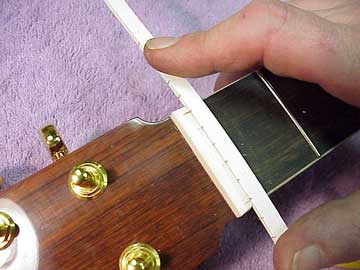
Then, to space the other strings, I simply lay my nut spacing rule against the front
of the nut with the wider graduations toward the bass side, and slide it along until
I find where the outside marks line up perfectly with two notches on the rule:
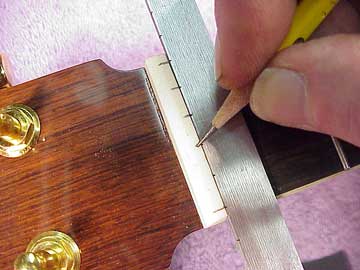
Then all I have to do is to mark the nut at the corresponding positions.
Now I have the nut marked perfectly, with the string spacing increasing 0.10 mm at
each increment from treble to bass, allowing just the right extra spacing between
the bass strings to give a good proportional look.
If I want the strings spaced equally, center to center, I can simply reverse the
scale after I make my proportional marks, and add new marks with the reversed scale.
The result is a series of marks which are equally spaced on centers, but vary in
width. I just need to be careful to cut the notches in the centers of my pencil marks,
whichever system I use.
Now that I have my steel nut rule, I can reproduce the markings very easily on the
edge of a scrap piece of plastic binding:
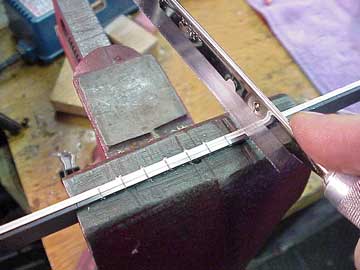
Clamping the two together and guiding my little saw through the cuts in the steel
rule, I make similar cuts in the plastic. That way I make up short rules with the
ranges proportional spacing that are suitable for various jobs. The flexible binding
is easy to bend right to the contour of a radius fingerboard:
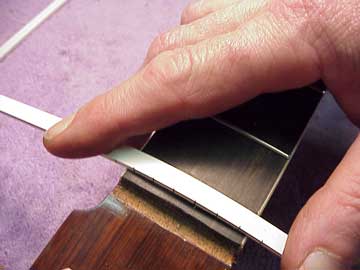
Now I have a bunch of disposable nut spacing rulers, and I can leave 'em lying around
the shop for anyone to use!
Back to Index Page


