The simplest and most obvious truss rod is a steel or other stiff structural support inlaid or laminated in the original construction of the neck. Here's a view of the end of a Martin guitar neck, showing a nonadjustable steel truss rod:

This steel truss rod has a strong "T" cross section, and along with a substantial mahogany neck, it provides plenty of resistance to bending. A thinner neck is more flexible and will need more support than this kind of rod can provide. A really big steel rod could be used, but it would be so massive that it would actually change the balance and feel of the guitar. An adjustable rod can give much more support without adding extra mass.
There are basically two types of adjustable rods: compression and bending rods. Each of these types may have either one-way or two-way action. One-way rods work to bend the neck "backward" against the tension of the strings, and are found in the vast majority of guitars. Two-way rods work in both directions, and are more frequently used by smaller manufacturers.
Bending truss rods are devices which actually bend as they are adjusted. This kind of rod is easy to understand because as it bends, it bends the neck along with it. Bending rods are made of two parallel elements, one pulling or pushing on the other to create the bend. Most new Asian guitars, Martin guitars, and many others use a bending rod. (You'll find photos of compression rods and lots of others on All About Truss Rods)
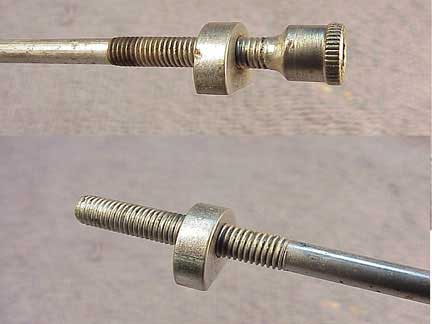
The original truss rod, pioneered by Gibson in the early 1920s, is a compression device, which actually squeezes the neck from the inside to compress the back of the neck, bending it against the direction of the string tension. One end of the rod is firmly anchored in the neck, and the other end has a nut and washer assembly to provide the tension. Take a look at this traditional style compression rod:

Notice how low (toward the back surface) of the neck the truss rod is mounted. The white strip above the round rod is a "filler strip" inserted in the channel above after the rod is installed. When the rod is tightened, it squeezes the wood inside the back of the neck, which is much smaller in cross section than the front (fingerboard) surface. Additionally, the fingerboard is very rigid and resists compression. A relatively light amount of compression is all that's needed to bend the neck backward to compensate for the string tension.
Gibson, Taylor, and many other makers use compression rods.
There is a two-way version of the compression rod, which has anchors at both ends:

Here, the rod actually rotates, and pulls the anchors toward each other to compress the back of the neck, or pushes them apart for an opposite reaction.
The adjusting nut of the truss rod may be placed at either end of the neck, so it may be accessible at the peghead (Gibson, Taylor) or through the interior of the guitar (Martin, Collings, Santa Cruz). Either way, the action is identical, and the functionality is the same.
You can't miss the peghead adjusting type:

It takes a 1/4" socket wrench. The most common sizes are 1/4" and 5/16" for this type of adjustment nut.
Many guitarists assume there's no truss rod if they can't see it at the peghead.
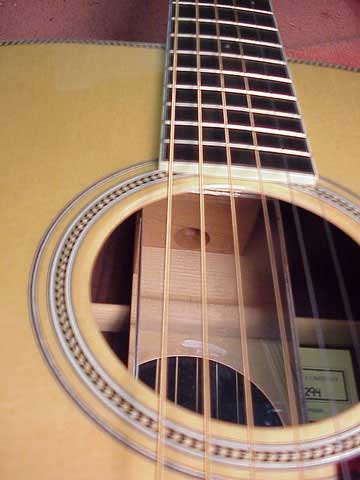
To adjust the truss rod on this Martin guitar, you simply stick a 5 millimeter hex key (Allen wrench) through the hole in the brace under the fingerboard:

Feel around a bit, and you can connect easily.
Other makers hide their adjustments way up inside, as with this Santa Cruz guitar:

I laid a mirror inside here so you can see the truss rod access hole in the neck block. It's way up near the top where it's invisible from the outside. Several makers put it there, partly to discourage musicians from adjusting their own necks.
There's really no substitute for experience, so ideally you'd leave truss rod adjustments to your friendly local luthier. As to your own needs, I hope you'll be guided by your sense of your own mechanical ability. That said, I'll get on to the topic at hand.
Regardless of the type, an adjustable truss rod affects only the shaft of the neck, the flexible portion from the nut to the thick part at the heel. The idea is to control the straightness of the neck by bending it backward against the pull of the strings, if necessary. But there are a few points of confusion about the utility of truss rods.
I think the second most important piece of misinformation is that a truss rod will prevent the eventual need for resetting the neck. I'll be dealing with the neck reset issue in future articles, so for now I'll just say that a truss rod has absolutely no effect on neck angle.
The single most common misconception is that truss rods are for adjusting action or intonation. While adjusting the truss rod does affect the playing action, that's a side effect and not the purpose for the adjustment. As a general rule, once the nut and truss rod are set, all action adjustment is done at the bridge, by raising or lowering the saddle. Intonation is affected by action, too, so correcting the action may improve intonation, but again, that's a side effect.
As novice players we're taught that a guitar neck should be straight, not warped. A true "warp" is a matter of wood seasoning unevenly as it gains or loses moisture. Good instruments are made with carefully seasoned wood in humidity controlled environments, so neck warping is not all that common.
What's not so rare is a neck that flexes under string tension, bending forward, appearing warped. Remove the string tension, and the neck straightens out.
Neck "straightness" is an interesting issue. In practice, a truly straight neck may not be ideal. Played open, or fretted in the low positions, a string vibrates in a wider arc than it does when fretted high up on the neck. In order to avoid buzzing, it's usually a good idea to have some forward "relief" or slight bend in the neck. With a bit of forward bending, the neck will allow for the wide vibrating arc of the long strings.
While some musicians have a light touch and can actually play a truly straight neck, nobody likes a neck with a reverse bend, or "negative relief." With such a neck, the string will tend to buzz like crazy in the low positions, from the nut to the fifth fret or so.
So, I find it useful to describe a truss rod as a device to control neck relief.
When it comes to adjusting a truss rod, the first step is to determine the neck relief, which must be done with the strings tuned to pitch. You can "sight the neck," looking down the outside corners of the frets from the nut to to the body. Sighting is really more useful for observing uneven frets, because neck relief can be a bit subtle.
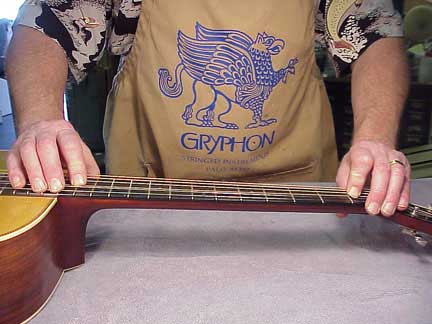
Here's how I do it. I simply mash the G string down at the first fret and at the body, usually the fourteenth fret:

Most of the time, I'll do this test in "playing position," but I thought it would be a bit easier to visualize here on my workbench.
The string is nice and tight when tuned to pitch, so it strikes a perfectly straight line.
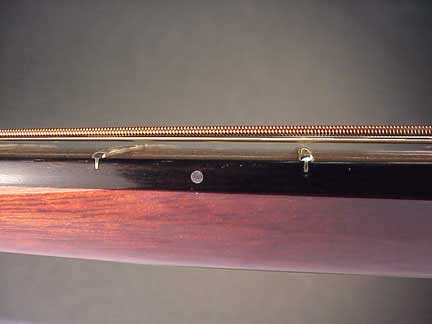
Then, all I have to do is look at the space between the bottom of that string and the top of the sixth fret:

Can you see that space? It turns out to be rather easy to measure it by simply looking at it. While you're staring at that little space, just try to imagine which of the strings might fit between the G string and the fret. A medium gauge first string is 0.013 inches which is just about the right amount of relief for a "regular" player. A hard driving bluegrasser is likely to need more relief, maybe as much as the third string itself, or about 0.026 inches.
The point is to determine the right amount of relief by experimentation. That is, play the guitar and adjust the relief until strings have about the same tendency to buzz when fretted at the low positions and high positions. A guitar that buzzes in low positions only may be in need of a neck adjustment for more relief. If it buzzes in high positions, a truss rod adjustment won't help - the action will need to go up at the bridge.
Actually making the adjustment is easy. You just turn the truss rod nut, and observe the results. Unless you crank really hard and break something, you are not likely to do any real damage by misadjusting a truss rod. If you get it too tight, you can loosen it later, and vise versa.
Here's a hot tip: Take the truss rod nut off, if possible, and oil the threads of the truss rod. Most of the time, the factory doesn't lubricate them, and you might be turning the nut against a lot of unnecessary friction.
Before you start wrenching away, please remember that the diagnosis is the key to the job. Make sure you understand what you're doing and why. If your guitar has the same tendency to buzz when played hard all the way up the neck, then rest assured that your truss rod is adjusted about right.