|

|
The heavy mold is bolted to the bench, and Jeff
has a special little pivot screwed right in the center. |
|

|
He takes his big "dish," a wood form
with sandpaper glued to its concave surface, and places it on the pivot
dowel pin. |
|

|
Then, all he has to do is spin the disc around
and around to give the end block, neck block, sides, and lining the exact
radius to which the top and back were clamped in the go-bar deck. |
|

|
Unfortunately, Jeff was not ready to bind any
guitars as I took these photographs, so I'll have to settle for just showing
his setup instead. Here it is, a pair of routers mounted horizontally. |
|

|
They are regular routers and just hang inside
this movable box affair. |
|

|
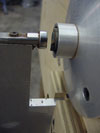
Outside, the router bit is centered in a convex
aluminum guide, outboard of which is mounted a "finger" with two
ball bearing guides. Jeff guides the guitar around, holding the sides tightly
against these two bearings. |
|
|
The result is a neat channel all around the top
and back, ready to receive the binding. Once the binding is installed, the
body is completely formed, and finishing begins. |
|

|
Look at these big mahogany planks. Jeff buys
mahogany in big boards, a full four inches thick. That way, make all his
necks from single pieces of mahogany, orienting the grain in the most favorable
direction. |
|

|
He cuts the neck's lateral profile on the bandsaw. |
|

|
And surfaces the face of the peghead on a belt
sander. |
|

|
This is his old shop-built thickness sander,
in semi-retirement, being used to even out the peghead thickness and sand
the back side. |
|

|
Cutting the dovetail is an operation best performed
with a router. Jeff's fixture holds the neck at the correct angle as he
guides the router. He can clamp the body inside this form to cut the mating
portion in the neck block. |
|

|
This heavy aluminum template assures him of consistent
results with no slipping. |
|

|
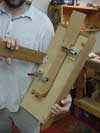
Here's a clever little router fixture. It's a
sort of table that Jeff clamps into a vise mounted on a free standing pedestal. |
|
|
Underneath, he has the neck clamped in place. |
|
|
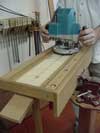
And, with the fixture clamped in the vise, it's
ready to go. He uses two different routers with this rig. The big one, here,
is for making the groove into which the truss rod will be inserted. |
|

|
A pair of rails on the edge keep the router right
on track. |
|

|
This smaller router rides in the space between
the lower rails, and the bit runs in the same groove as the big router.
By shifting the neck underneath the table, Jeff can cut a pair of extra
grooves alongside the main truss rod groove. |
|

|
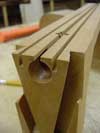
Notice that the grooves are not exactly parallel,
but run in approximately the same taper as the edges of the neck. |
|
|
From the end you can see the truss rod adjusting
pocket, and the depth of the two outer grooves. |
|

|
Jeff uses two stiffening rods of carbon fiber
composite in addition to the adjustable truss rod, for greater neck stability. |
 |
Here are the various stages of fingerboard preparation.,
from left to right:
the blank board, fret slots cut; binding glued on, and completed. |
 |
After cutting the fret slots on his table saw,
Jeff carefully marks the fingerboard profile with a thin white pencil line.
I asked him why he didn't just make up a bunch all the same, and he told
me it was because he's called on to make so many different custom styles. |
 |
A quick stock removal on the table saw. |
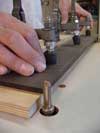 |
And, final shaping on the router/shaper. This
vertical router is set up for pattern duplicating, with a bearing collar
to guide along the various templates Jeff uses for cutting out parts. |


