|

|
All of his fingerboards get binding. In fact,
most of them are ebony boards with ebony binding. Jeff prefers the trim
appearance of a bound fingerboard, so the ends of the frets and fret slots
are not visible from the edge. |
|

|
He makes all of his own wooden binding and glues
it in place, using tape to hold it while the glue dries. |
|

|
These days, many luthiers use vacuum clamping
for fixturing as well as gluing. Jeff has a small vacuum pump way over in
the corner, which he uses for holding delicate parts onto various shaper
templates. |
|

|
This is the back side of his fingerboard profiler. |
|

|
From the front, it's just a rubber gasket forming
a vacuum chamber. |
|

|
He aligns the fingerboard by careful measurement,
again preferring the hand-and-eye method over jigging because he makes so
many different styles. |
|

|
With the vacuum drawn, the fingerboard can stand
up to this big custom cutter head! |
|

|
And, it comes off clean as a whistle. |
|

|
In fact, that's a fine finished surface. |
|
|
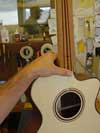
Back in the setup room, the neck gets its first
dovetail fitting' |
|

|
Even in this rough state, Jeff makes sure the
neck fit is just about perfect. |
|
|
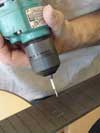
With the neck mounted on the body, he positions
the fingerboard on the neck, and drills a pair of tiny holes for locator
pins, so he can glue it right where he wants it. |
|
|
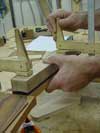
With the neck back off the body, he glues the
fingerboard in perfect alignment, thanks to those two little removable steel
pins. Now, you may notice that this neck has a peghead overlay on. Depending
on the instrument, he may laminate and shape the peghead before or after
gluing the fingerboard. |
|

|
To facilitate fitting the nut, Jeff likes to
cut the end of the peghead veneer at precisely the correct angle before
gluing it on. This little tapered fixture works with his router table to
produce that bevel cut at the nut end of the veneer. |
|

|
Then, he places a peghead shape template on the
veneer, drills some locating pin holes where the tuner posts will be, and
pins the veneer to the template with some skinny dowels. |
|

|
The template rides up to the pattern copy bit
on the shaper table, and the peghead veneer is shaped to match the template. |
|

|
Staking the veneer out on the work table, Jeff
cuts, bends, miters, and glues the binding on the veneer. |
|
|
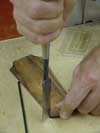
Not all pegheads get binding. This Brazilian
rosewood one is being fitted with ebony binding. |
|

|
After the pehgead veneer is cut and prepared,
Jeff clips it in place after inserting a nut blank. That way, he's assured
that the nut will fit just right. |
|
|
More locating pins, this time through the same
holes he used on the shaper template. |
 |
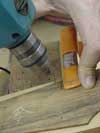
These are also small wood dowels, and he breaks
them off flush with the surface after applying glue. |
 |
The locating pins will disappear when the tuner
holes are drilled. By breaking them off, he doesn't have to make a special
clamping caul for gluing the peghead veneer. |
 |
If there's a lot of outboard waste, Jeff trims
it roughly on the bandsaw. Notice the saw isn't running. We're just photographing,
no cutting. He assured me that he keeps his fingers away from those teeth. |
 |
Now, the peghead veneer itself becomes the template,
and rides along that bearing as the cutter trims the neck to match. |
 |
After the holes are drilled, the neck finally
has that Traugott signature look. |


