|

|
OK, we staged these next few shots, but it's
better than nothing, I think. Jeff uses this heavy saw-rasp thingy to carve
his necks. |
|

|
Also, he likes this small spokeshave. For a custom
builder, hand carving the necks allows for infinite variability. Jeff could
set up some shaper templates, but he tells me he likes to carve them by
hand. There is a therapeutic nature to this kind of hand woodwork, don't
you think? |
|

|
Block sanding helps him keep his profiles smooth
and straight. |
|

|
This neck is now all but finished. |
|

|
Time to go back to the body for a final fitting.
Jeff inserts some paper thin shims at the bottom of the dovetail pocket, |
|

|
slips the neck in place, |
|

|
And clamps it up tightly. In fact, it's so well
fitted that it doesn't need glue to hold it in place. Before taking the
clamps off, Jeff has a quick little special trick. |
|

|
See those two strips of tape? They are fastened
to the underside of the fingerboard, and will hold the end down to the body
when he presses them up tightly inside. |
|

|
Now, with the clamps off, Jeff "shoots"
the fingerboard perfectly straight by sanding with a long block. He said
the thickness of the tapes under the end raises the fingerboard just enough
to create the perfect "drop-off" over the body. Clever, eh? |
|

|
Once he's pleased with the straightness of the
neck, he can begin fretting. |
|

|
Each fret gets trimmed to fit, overhanging the
binding. |
|

|
Jeff uses a plastic hammer to avoid injury to
the top of the fret crown. |
|

|
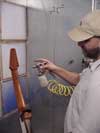
After frets are installed, it's into the spray
booth for some lacquer. All of Jeff's instruments are finished with high
gloss nitrocellulose lacquer. |
|

|
After weeks of spraying, sanding, spraying and
drying, a final buffing gives the body and and neck a high class look. While
you're at it, look at that koa back. That's what I call "mother-of-curl!" |
|

|
Back in the setup room, the neck gets fitted
back on and glued in place. |
|

|
Jeff makes each bridge himself, and locates it
for optimum intonation by careful measurement. |
|

|
Here again, he works by measurement rather than
with standardized templates because he gets involved in so many different
scale lengths, unusual tunings and stringing, not to mention the infamous
"fan fret" models. |
|

|
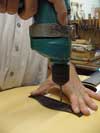
Held in place against the temporary strips of
masking tape, Jeff drills the first and sixth bridge pin holes to locate
the bridge precisely. |
|

|
These are two steel locating pins, machined to
fit very tightly so there won't be any shifting when the bridge is clamped
in place. |
|

|
The sharpest scalpel makes a clean scribe line
right into the precious new finish. Jeff takes pains to scrape off every
bit of finish under the bridge to get the best possible glue joint. |
 |
The last gluing operation is the bridge. |
 |
Finally, time to set up, make a saddle and nut,
install tuners and string it. |
 |
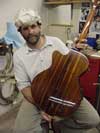
Here's Jeff with his latest creation. It's a
Brazilian rosewood fingerstyle cutaway, and it looks great. |
 |
Here's the moment. . . |


