Using the same clamp and aluminum caul I used for heating the old plate, I glue and clamp my new plate:

The top caul is 1/2" thick acrylic with a heavy wood block to spread the pressure uniformly to flatten the top as I laminate the new bridge plate.
I'm using hot hide glue for both the bridge plate and the bridge, by the way.
Now I'll deal with those big holes where the adjusting post supports were countersunk into the spruce top. The holes are 7/16" in diameter, so I'll use my 7/16" plug cutter to make some spruce patches:

And I'll just glue and clamp them in place:

Next day, it's a quick job to trim off the tops of the plugs:

I have to make the new bridge to fit the top, so I'll trace the "footprint" of the old one by covering the bottom of the old bridge with wide masking tape and cutting around the bridge:

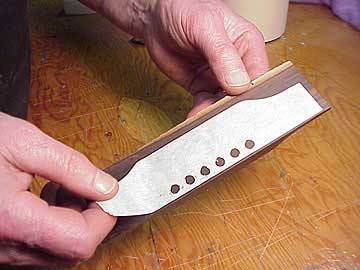
I'll punch out the bridge pin holes:

And stick the template on the bottom of my Brazilian rosewood bridge blank:

That way, when I cut the blank to match the outline, and drill the holes through the template, everything will line up just right. To gain just a bit of extra gluing surface, I'm making my new bridge 1/16" wider at the back edge. That small amount won't be noticeable once the job is complete, and will help the bridge stay in place.
More