Bridge Plate Replacement
© Frank Ford, 12/30/98; Photos by FF, 12/28/98
This is a classic repair. The bridge had become loose while this 1964 Martin 0-16NY sat in its case, unnoticed by its owner. Months or years of relentless pull by the strings slowly deformed the top, which was no longer supported by the strength of the bridge.
The bridge plate bent under the load, and began to crack through the bridge pin holes, and the top developed cross grain cracks in the same area.
Here you can see the extent of the deformation:

The area was so badly warped there was no hope of gluing the bridge back on without flattening and reinforcing the top.
While it would be possible to heat and flatten the bridge area of the top, the broken bridge plate and spruce would not be nearly as strong as they were when the instrument was made. I decided it was time to replace the bridge plate.
In order to remove the bridge plate safely, I needed to heat it up in order to weaken the glue bond while I pried it off.
I have a 1/2" thick aluminum block the size and shape of the bridge plate, and I heated it on my hotplate:
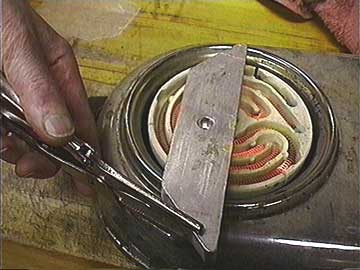
I'd estimate the temperature at around 350 degrees Fahrenheit.
My aluminum block screws onto the foot of my big deep throat clamp:
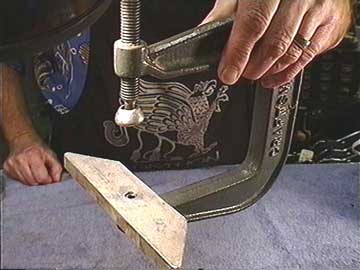
I use this kind of setup for most bridge gluing as well as bridge plate removal.
The aluminum block pivots so I can slip it into the guitar body without damaging the finish around the soundhole:
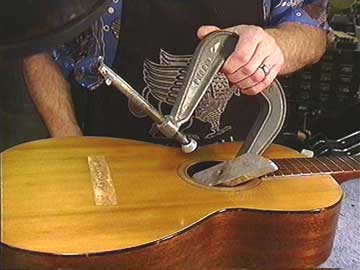
Because the top was so deformed, it was necessary for me to clamp the block tightly to flatten the bridge plate to get good heat transfer:

Notice the aluminum caul on top. It helps keep the finished surface cool while I apply heat from the inside. This is tricky work, and I moved quickly to release the clamp and feel the temperature of the finish to avoid blistering or other heat damage.
Here's a view from the inside with my black & white inspection camera:
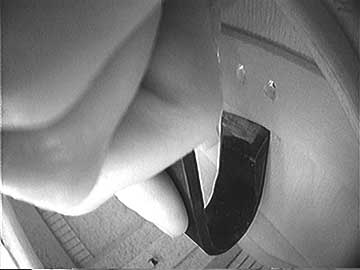
I used my big flat bent chisel to catch the back edge of the bridge plate and pry it loose. Actually, I didn't pry so much as pull straight downward toward the back of the guitar. I had to work fast before the bridge plate cooled off, so I wasn't able to take progress photos of this operation.
The bridge plate came out well, in only three pieces:

I glued the pieces back together to make a pattern for my replacement bridge plate.
Inside, the top looks pretty clean where the old plate came off:
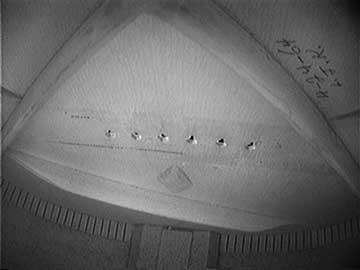
Notice the date and initials on the inside of the top near the bass cross brace. For a short while in the 60s, they were signed in this way. (The only other period I know when this was the custom was from about 1880 to 1900.)
More