Page 2 of 3
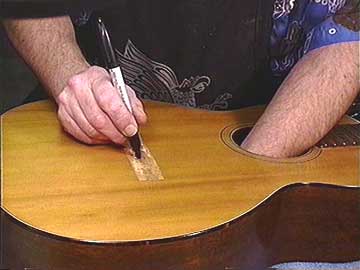
I used a piece of maple the same thickness as the original (.100") and traced
the outline of the old bridge plate:

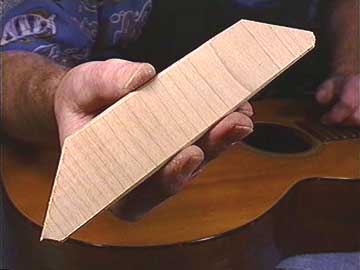
I cut it to shape and beveled all the edges just as the original.
Notice the grain direction of my new bridge plate:

Because the string tension is in a straight line with the grain of the top, I like
to orient the grain of the bridge plate the same way, to avoid cupping and deformation.
In this case, it's doubly important, what with the cross grain breaks in the top
between the bridge pin holes.
For an "important" restoration on a vintage instrument, I'd restore
the spruce separately and use an original style bridge plate. I've just written an
article on this sophisticated technique for Acoustic Guitar Magazine, and it should
appear around April, 1999. I'll post that material on FRETS.COM shortly afterward.
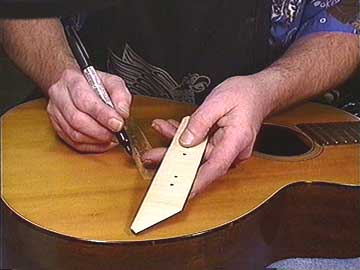
Holding the new bridge plate in place, I marked the location of some of the bridge
pin holes:

And checked to see that the holes and plate were lined up correctly:

Time to glue. Hide
glue is my choice, because it dries hard and becomes very
rigid, with literally no tendency for "creep," even at elevated temperatures.
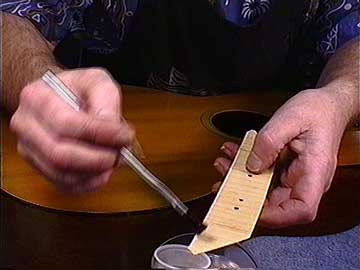
Any water based glue would cause my bridge plate to cup and become difficult to handle
as I worked with it, so I brushed the back side with water to balance the forces
of absorption:

Working quickly, I brushed on hot hide glue to the upper surface:

Hot hide glue is usually dispensed from a glue pot, which is typically a lot more
work to maintain than a bottle of carpenter's wood glue. I think the advantages of
hide glue outweigh the trouble and shortcomings, but I really don't like to deal
with a glue pot, so I use these little plastic cups and float them in a beaker of
hot water.
Click
here for a description of how I use hide glue without a glue pot.
More
1
2
3
Back to Index Page


