 |
Out in the machine tool area, there is a host of standard woodworking power tools that handle the rough lumber for necks, forms, fixtures, etc. |
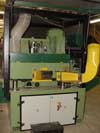 |
Here's the newest "wood hog" in the shop. |
 |
Here's Bruce, standing by to give us a sense of scale. |
 |
Inside, there's a GIANT version of the Wagner Safe-T-Planer I use on my drill press. This one has a 30 horsepower motor, and can really chew through heavy lumber. |
 |
It can also surface a fingerboard like this one, leaving hardly a tool mark! |
 |
Here are the two big FADAL CNC milling machines. These monsters are capable of the highest level of precision, and we'll be seeing them in action all through the manufacturing process. |
 |
Here's a bridge blank on its vacuum chuck in the CNC machine. At the very back, you can see the replica 1920s Martin "pyramid" bridge, also made on the CNC> |
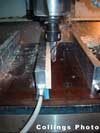 |
Here the CNC uses a milling cutter to surface a piece of spruce. |
 |
Then, it changes its own cutter head and profiles the upper "tongue depressor" brace for a guitar top. |
 |
Another quick tool change, and it slices the braces apart, cutting almost all the way through. |
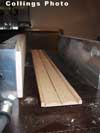 |
Done. Simple parts made with high precision for use by the craftsmen in the assembly area. All they have to do is break the braces apart, cut them to length and use them. |
 |
A bunch of scalloped top braces is made from a billet of quartersawn spruce/ |
 |
Same deal, neatly made braces are easy to break apart for use. |
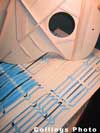 |
Even the tiny little soundhole reinforcement braces are made on the CNC machine. A flat piece of spruce is stuck down with that blue double sticky tape so it can be precision cut to the exact shape. Lots of those little braces are made at one time. |
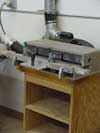 |
This is an earlier bit of machinery. A gang saw with about 50 blades. |
 |
A profiled section of mahogany gets held down by the clamp fingers. |
 |
And, a nice long piece of kerfed lining is cut in one pass. |
 |
Back to the CNC. Here, a nut blank is held in the fixture, cut to thickness, and the bottom angle is established. |
 |
Real precision is available using this kind of milling apparatus. Each nut blank fits so precisely that it is easily held in place without glue. |
 |
Then the blank goes back on the machine. |
 |
And, the profile is created, the ends are trimmed and the height is established |
 |
See? It looks great, and needs only the slightest amount of hand work to make it perfect. |
 |
Even the saddles are made and compensated on the CNC. |
 |
OK, let's build some guitars!
Bookmatched tops are glued up on this "windmill" fixture, which allows for a nearly continuous production. |
 |
Then, the top takes a quick visit to the CNC. |
 |
The milling cutter drops down. |
 |
And the exterior profile is cut precisely. |
 |
Then the top gets its soundhole decoration. |
 |
This custom made cutter makes all the soundhole rings in one pass. |
 |
Each guitar model has its unique soundhole ring pattern and has a unique cutter. After the soundhole rings are inlaid, the top goes through a wide belt sander to smooth it to the proper thickness. Here's where Bruce Van Wart steps in. |
| He judges the stiffness and taps to hear the resonance of each top. Then he adjusts the thickness, taking into account the particular size and model guitar. For optimum performance, Bruce also sands the perimeter of the top to thin it differentially. (I don't have a shot of him "tuning" a top because he was my guide, and couldn't be doing this job when I visited. And, he took all the other pictures, so he wasn't doing it then, either!) | |
 |
Beneath the top brace gluing bench there are bins of those precisely machined top braces. |
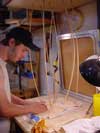 |
The braces get coated with glue, positioned and pinned in place with "go bars." As soon as all the go bars are in place, and the glue begins to "grab" a bit, the bars are removed. |
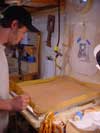 |
And, the lid is dropped down, revealing that this go bar deck is also a vacuum gluing fixture. The go bars are only used to make sure the braces have no chance to slip before the vacuum is applied. |
 |
Thanks to atmospheric pressure the whole business gets uniform clamping pressure. |
 |
You can really see the braces through that rubber gasket. |
 |
A couple of braced tops. Notice that some of the braces hang over the edge of the top. Those will actually be trimmed after the top is glued to the sides. |
 |
Bruce Turner, again at the windmill, this time gluing some backs together. (Dr. Bruce Turner, M.D., is possibly a bit overqualified for his position at Collings Guitars.) |
 |
Outline is cut on CNC. |
 |
After the back strip reinforcement is glued in place, this simple router fixture goes on top. |
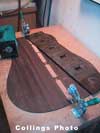 |
And the strip is cut out to receive the back braces. |
More