 |
At each end of the rig, there's a rocker. As the neck is rocked back and forth, the fingerboard is sanded to a nice straight radius shape. |
 |
The end rockers have different radii, producing the classic compound radius fingerboard for great playability |
 |
Out of that machine and into another special holder. This one has a rigid support for the heel and end of the fingerboard |
 |
The shaft of the neck is also supported for its entire length beneath the arbor press. |
 |
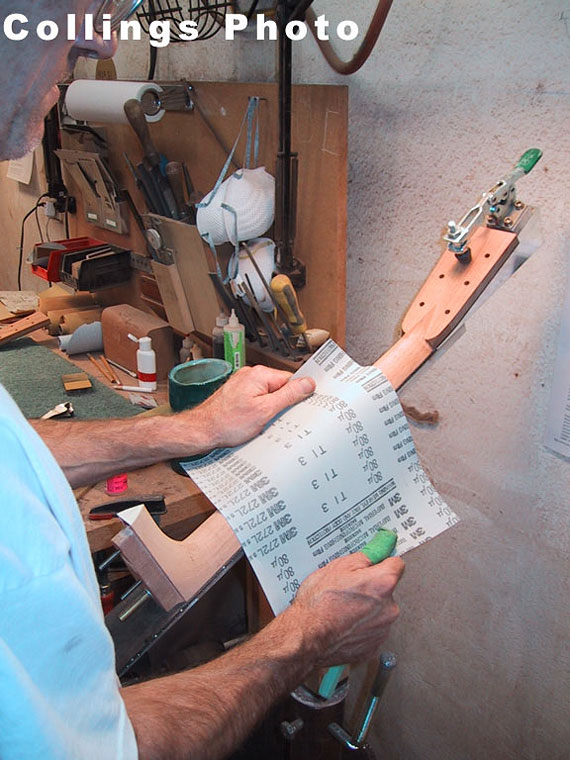
Frets are pressed in place with this unique compound radius aluminum "foot." |
 |
It has the same compound radius, compressed to only about 3/4" so that it will fit any fret along the entire fingerboard length. |
 |
Here's another cool neck fixture. |
 |
It's a free standing neck holder, adjustable to any angle or height. |
 |
Easy to walk and work around. |
 |
A little "Chattanooga Choo-Choo" action on a new neck. |
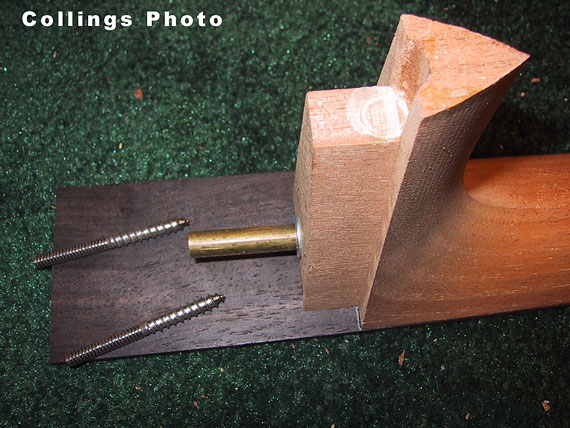 |
Here's the neck joint. |
 |
Here's the neck joint with its bolts in place. |
 |
The body gets a matching mortise cavity routed using this fixture. |
 |
No comment. |
 |
The neck tenon is cut in a similar fashion. |
 |
A router fixture, and a straight cutter give the neck the approximate joint configuration, |
 |
I wondered why this isn't a CNC job. |
 |
Although the joint is established, it will need some fine tuning to make the angle just right. |
 |
Now, here's a tool I'd like to have around the shop. |
 |
The neck fits into one end. |
 |
And the body into the other. |
 |
To simulate the ideal bridge height, a machined spacer is placed right where the bridge will eventually be situated on the top of the guitar before the body is clamped into place. |
 |
The body fits right onto a surrogate neck tenon. |
 |
Now, the fun stuff. |
 |
An air turbine drives a little cutter along the heel. |
 |
Precisely cutting the mating surface against which the neck angle will be established when the neck is bolted on the body. |
 |
A tiny bit of hand fitting makes for an airtight joint. |
 |
A quick bit of spot drying on a small binding repair before the body goes "into finish." |
 |
A thick, clear polymer coating is applied with at classic tool. |
 |
That polymer filler/sealer is cured in a special high intensity UV light booth. |
 |
That's one bright light, and it cycles up and around the rotating body or neck, curing the coating in a matter of a few seconds. |
 |
Collings guitars are finished with nitrocellulose lacquer, and this mad chemist is John Allison, master sunburst application expert. |
 |
It's hand-and-eye work all the way. |
 |
Every possible area is carefully masked to facilitate cleanup. |
 |
And, here's the result. Notice that the guitar on the left is a slope shouldered D, basically a Gibson replica. That one got a sunburst clearly in keeping with the Gibson tradition. The other two are Martin style instruments, and their sunburst patterns are clearly of Martin origin. It's this attention to detail that characterizes Collings guitar. I think of it as a matter of "doing your homework" and knowing the history of these things! |
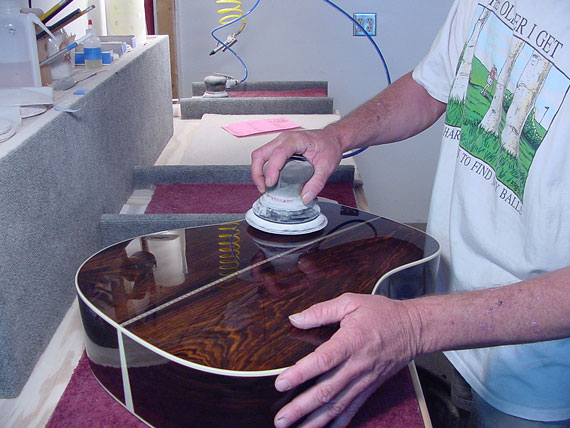 |
A bit of orbital scuff sanding before a final "flow coat" |
 |
And wet sanding before buffing. |
 |
The drying room has some beauties hanging around. |
 |
Steve McCreary gives this one a final buff. |
 |
Roy Strait works against a lot of glare as he inspects the finish for any flaws |
More