 |
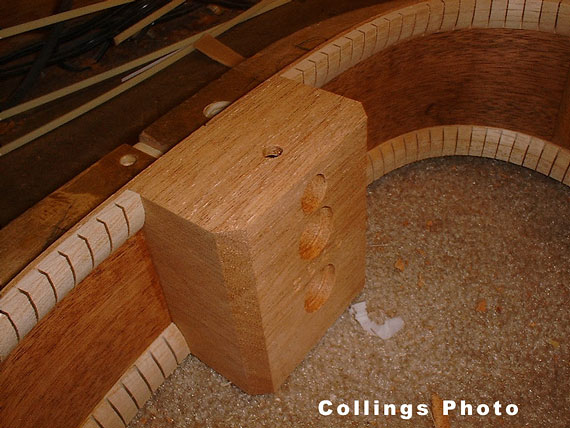
A similar hole in the top edge of the neck block aligns the top. |
 |
Take a look at the end block. Martin and other makers have used a reinforcement strip to help keep the end block from splitting in case of a dropping accident. Collings does them all one better by actually inlaying the reinforcement for extra rigidity. |
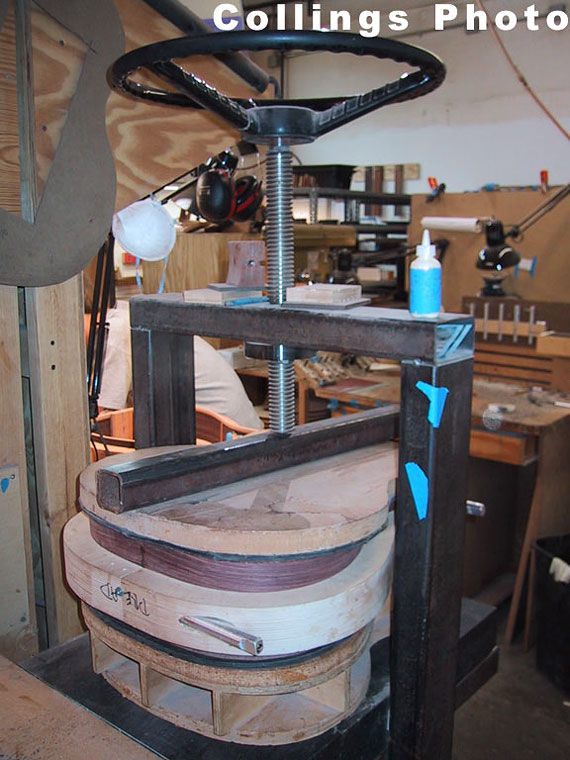 |
Tops and backs are glued on simultaneously in this press. Notice the truck steering wheel. (It is Texas, after all.) |
 |
As they are glued up, the sides remain in the mold and are held there by a spreader. |
 |
Here you can see the spreader through the soundhole as the braces are fitted into the linings. |
 |
After glue-up the spreader comes out through the soundhole. |
 |
The end wedge inlay is router using a laminate trimmer and a simple fixture |
 |
It's easy to locate this fixture, sighting it to the back center inlay. |
 |
Ivoroid inlay and purfling. |
 |
Before the top and back binding is routed, the end inlay is glued in place and trimmed. |
 |
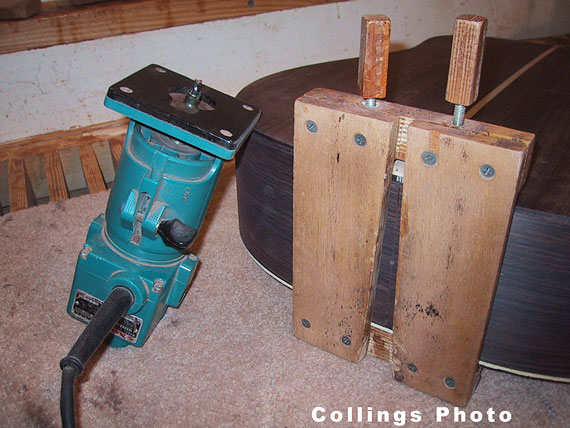
Here's another "first generation" fixture - a pair of regular routers mounted in a bench setup. |
 |
Each router has a wooden bearing collar and tongue on which the guitar body is guided as the binding ledge is routed. |
 |
A few layers of packing tape adjust the depth of cut. Like most factories, the Collings shop is a combination of various kinds of tooling. Old style tools still do their jobs as new ones are developed. |
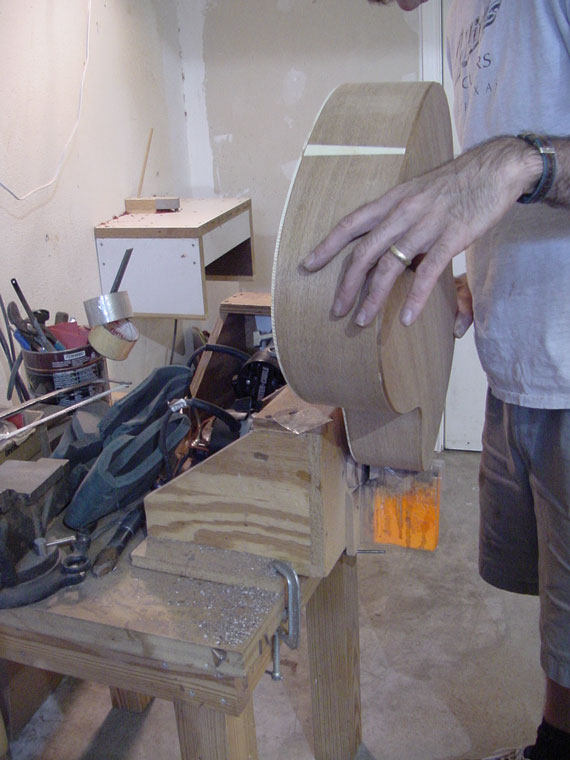 |
It takes a steady hand to guide the guitar body across the cutters. |
 |
There's quite a battery of other routers, each set up for a specific purfling cut. |
 |
Binding is hand fitted around the body. (As if there were any other way!) |
 |
Masking tape does a fine job of holding the binding as the glue dries. |
 |
More hand work. There's always a bit of trimming here and there. |
 |
Check out this cool sanding block. It's plastic (high density polyethylene, maybe) with lateral saw kerfs making it extremely flexible in only one direction. |
 |
With this long block, it's easy to "fair" the curves of the sides. |
 |
Here comes another cool simple setup. Herringbone wood top purfling and ivoroid binding are glued all around the body. |
 |
That particular combination of materials is a bit of a problem to sand or scrape level with the spruce top without damaging the soft spruce. |
 |
The Collings solution. A flush cutting router setup. |
 |
Simply running the cutter around the top, it slices the binding a purfling without touching the spruce. |
 |
Neat, isn't it? |
 |
A bit of finish sanding at the downdraft sanding bench. |
 |
All the time, angles are kept constant. |
 |
And everything is checked, and checked again. |
 |
Necks are made from seasoned genuine mahogany. Rough blanks are laid out for cutting on the band saw. |
 |
The rough blank is trimmed on a shaper fixture. |
 |
And, as with so many other parts, alignment holes are drilled so the blank will "index" on various fixtures. |
 |
Here's where the CNC really shines. Nothing matches its ability as a neck making appliance. Right now, it's trimming the peghead for gluing on the "ears." |
 |
Changing cutter heads, the machine drills a hole at the heel end. |
 |
A heavy hardwood dowel is glued into the hole. |
 |
Everything is calculated to line up just right. Here, the dowel reinforces the neck mortise joint so the hanger bolts will hold extra well. |
 |
The ear gluing bench. |
 |
Gluing ears. To avoid wasting a lot of mahogany cutting an entire neck from a 4-inch thick piece, Collings adds a bit of extra width at the peghead by gluing on these little ears. |
 |
Back on the CNC for some more tooling. |
 |
Flattening the peghead. |
 |
And, leveling the fingerboard surface. |
More