 |
Here's the result of staring at all that glare. All around the setup area, people talked about the little flaws they found, and discussed how to fix them. I found out that there are no real secrets to making a perfect finish, it's just a matter of chasing down all the tiny details! |
 |
Richard Johnston and Steve McCreary discuss exactly that. |
 |
They do take it seriously here, don't they? |
 |
All over the place, there are instrument in progress. Bins of necks with their paperwork wait for their bodies to get ready. |
 |
Racks of bodies are stashed above most of the work stations. |
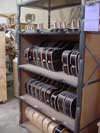 |
And on roll-around carts. |
 |
Upstairs, there are mandolins in progress. More on that a bit later. |
 |
In the setup area, more work hangs overhead. |
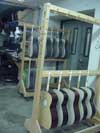 |
Outside the finish area, racks of bodies in progress. I asked Steve how many instruments were in progress at any given time. "A couple hundred, I think. Could be more," he said. |
 |
Here's a very special one. It's Gryphon's next Brazilian rosewood dreadnought, featuring wood selected by Richard during his visit last year. |
 |
An aerial shot. |
 |
Here's the setup room. |
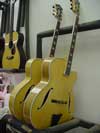 |
And a couple of the illusive Collings jazz guitars. |
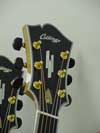 |
Not many of these guitars get made every year because there's so much demand for "standard" instruments. |
 |
Some of this week's work. |
 |
Setup includes assembling the neck and bridge. This fixture locates the bridge position, and centers on the neck. |
 |
A couple of quick index holes. |
 |
And a slightly undersize surrogate bridge drops right in place. |
 |
Scribing around the template with a sharp knife, a really clean line is established. |
 |
Then, on comes another template. |
 |
This one guides a router |
 |
And the finish is routed off. The cutter is set to slice off just the finish within the scribed lines. |
 |
Pretty neat! |
 |
Then a bit of chisel work to take off the two little doughnuts of finish, and to point up the corners of the gluing area. |
 |
Notice the bottom of the bridge. A little ridge was established by CNC machining, so that the bridge actually overhangs the finish by about 1/16" all around for an incredibly neat glue job. |
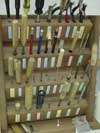 |
Each setup station has a neat array of hand tools. |
 |
Jay Mercadal trial fits a neck. |
 |
Masking tape comes off the neck tenon. |
 |
And the last little bit of tape goo is cleaned off. |
 |
Holes are counterbored for tuners and bushings. |
 |
Here's that routed bridge area again. |
 |
This time another jig keys into the holes. |
 |
Oh, yes, and this is yet another instrument destined for a trip to California! |
 |
With this jig in place, the router removes finish where the fingerboard will be glued. |
 |
The fingerboard doesn't need a lot of gluing strength at this point, and glue is applied only to the "E" shaped track routed in the top. Then, if the neck needs to be removed some day, there is less likelihood of damage to the top. |
 |
Bridges get clamped in the usual manner. |
 |
And, the instrument hangs around for the glue to dry |
 |
Last minute detail work on the frets includes a bit of leveling. |
 |
Buffing the frets and fingerboard. |
 |
Steve McCreary says, "Mine is the last operation. I do all the pickguard gluing so that I'm the last guy who touches a guitar. That way, I can also inspect each one an make sure everything is right. If I'm not at work, we don't ship any guitars that day. Simple as that." |