
From a former life, I have
a large supply of old hard steel phonograph needles. I stuck one in
from each side of the cork, and glued them in place with a bit of cyanoacrylate:
Then, I proceeded to mill off a section of the disc from the side opposite the 1/4" pin:

It was easy enough to set the wheel back on my vise with the bronze slider in place, and test the balance:

A few trips to the mill and I had it balanced rather well, I think.
This is the drive shaft, a simple piece of 3/4" drill rod. I milled a 3/16" keyway in the shaft for the pulley:

And turned down the other end to be a nice fit for the crank disc:

After pressing the disc on with some green Loctite, I spotted a place to drill for a pin. A quick touch with a 1/8" end mill gave me a flat land to drill through:

I drilled through the center with a 3/32" bit:

A few gentle taps seated a spring roll pin to finish the installation of the crank disc:

Time to make some bearings.
I made all three bearings in pretty much the same way, first turning the outside to be a slip fit (.003-.005" undersize) in the casting where I'd bored or reamed.
Bearing bronze is expensive stuff, so I was determined to waste as little as possible. First, I'd part off the length I'd use:

Then, center drill both ends:

And, mount it between centers. Here I'm using my "drive center" so I can turn the entire piece without having a drive dog in the way:
Because it's between centers, I could remove the piece for trial fitting in its future home:

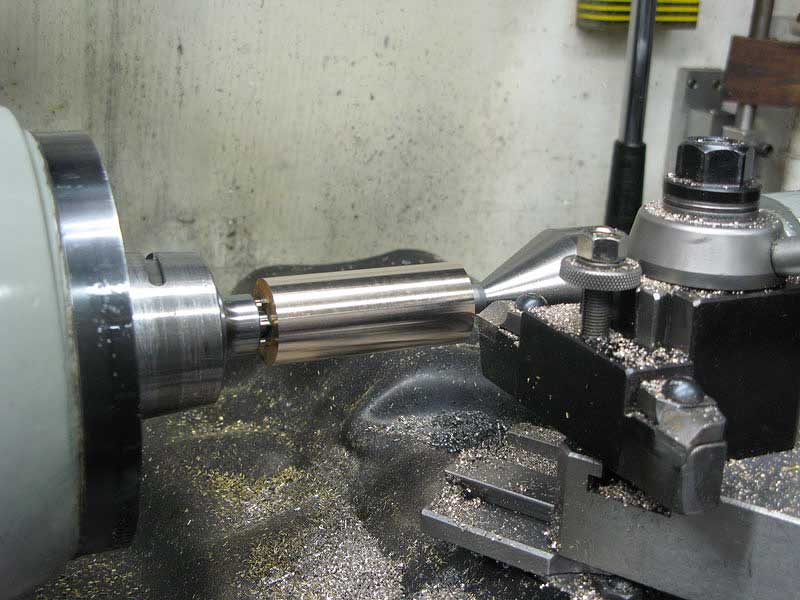
Once I had the O.D. established, I chucked and bored the hole for the 3/4" drive shaft or the 1/2" file rod:

A final touch with a 3/4" reamer gave me a nice fit for the drive shaft:

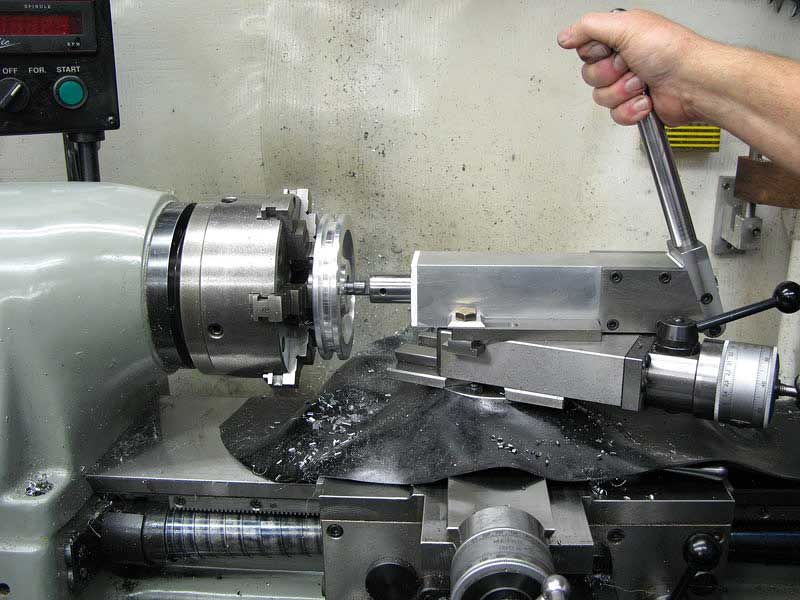
The inboard end of the drive shaft bearing sticks into the center of the casting, and it gets a 1/4" hole for oil to leak in to lubricate the bearing. I used my cross drilling jig on the drill press:

All three bearings went in the same way, slipped in with some green gap filling Loctite to secure them. I made the drive shaft bearing a bit over length so I could trial fit it to get just the right clearance with the file rod, yoke and crank in place:
Kennards Self Storage is a well-known national chain of self storage facilities. The company's culture is built around the values of the Kennards family. Sam Kennard, son of founder Neville Kennard, has been CEO of the company since 1995. He explains that the company's culture is one of innovation and family values. Founded in 1945, Kennards is one of Australia's largest storage companies.
kennards self storage offers a variety of storage units ranging from 1x1m lockers to 6x6m garages. Some locations offer wine cellars and gun lockers. There is also a fax machine and meeting rooms for business users. In addition to self storage, they also offer other services, such as tea and coffee making. For your convenience, these facilities also provide secure access to your belongings 24 hours a day.

Once I had it fitted right up, I marked the length with a knife so I could reinsert it to the proper depth:

In it went, along with a generous coating of that green Loctite:

Glad I worked fast. As soon as I got the bearing in place the Loctite seized, and the job was done.
The file rod had just the very slightest tendency to bind in the upper and lower bearings, so I lapped them using a spare piece of the same drill rod I'd use to make the file rod:

It was just a minute's work with the yellow soft metal lapping compound.
I milled off the protruding bit of the upper bearing flush with my milled surface on the casting:

And, I cleaned up the excess drive shaft bearing.

The file rod started out as a piece of 1/2" drill rod, and I drilled the bottom three inches deep to act as a sort of oil pump:

I drilled the upper end to receive the file tang, and cut away 1/2 of the diameter:

As the rod pumps up and down in the lower bearing, it naturally pumps a bit of oil, so a relief hole above the bearing would provide an escape for the trapped oil:

Andy suggested orienting the hole to squirt a bit toward the yoke, and that made sense to me.
Wow, here we are back at TechShop. Once again, I took advantage of the large lathe to take a section off the end of a nice 2" diameter steel rod. (That orange paint is my personal shop code for 12L14 leaded free machining steel.)

While I was there, I turned the contour of the "hat" or clamp that holds the file on the end of the file rod. I slung the compound way around back to make quick work of that taper:

Parting off 2" steel is so much easier on a big lathe:

Back home, I stuck the hat backwards into a collet to finish the detail turning, first drilling:

And then boring to 1/2"

I ground a simple round nose HSS tool to turn the inside contour:

Form tools like this are easy to make, and often don't have to be particularly accurate to do a nice job:

Then on the mill, I drilled for a 10-32 set screw:

When tapping small holes on the mill, sometimes I do the job with the power
off and simply turn the chuck by hand:

I got hold of a two-inch thick five-inch diameter aluminum disc to make my
drive pulley. Chucked up in the four jaw, I was able to turn a shaft section
down, and finish it with that same rounded form tool:

Reversing the piece and switching to a self-centering chuck,
I finished off the pulley, first by trimming out the other side:

Then, drilling the center:

And, boring for a nice fit on my drive shaft:

I used a regular 1/8" parting
blade to cut the V-belt groove to depth, and then set the compound to the
right and left to achieve the required 38-degree included angle:

Ooh, here's the fun part. I get to use my lathe slotting tool.
I made up a nice little 3/16" cutter for the slotter, and, retracting the compound .001 each time, I took a lot of quick strokes and cut the keyway:
