
1935 Martin 000-28: Refretting Technique
This is the second half of the neck reset article and is the procedure I generally follow after resetting. Resetting the neck on most flat top guitars results in a slight "hump" or uneven section of the fingerboard where the neck joins the body. Also, most guitars old enough to need neck resetting also show a fair bit of fret wear, making it logical to refret rather than to try to level the existing frets. So, to achieve the best overall playability, I usually level the fingerboard and refret after resetting the neck.
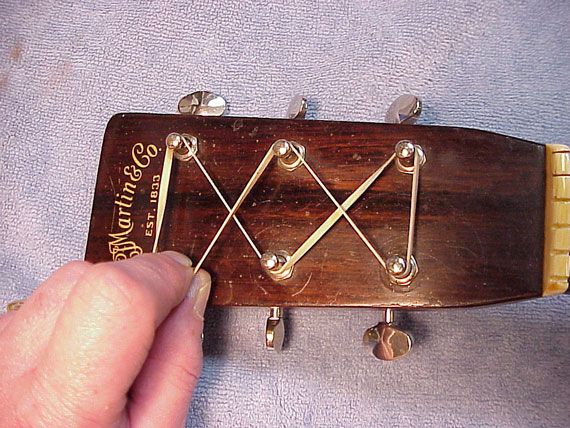
Take a look at the reset article if you'd like to see a full picture of this fine 1935 Martin 000-28. Don't forget to check out When Frets Go Wrong, for details on various difficulties that can occur when fret work doesn't go just right. I've written other articles on refretting, and I suggest them for further reading, too. Mandolin Refretting, and Martin D-35 Refretting both cover some extra topics that I haven't included here.
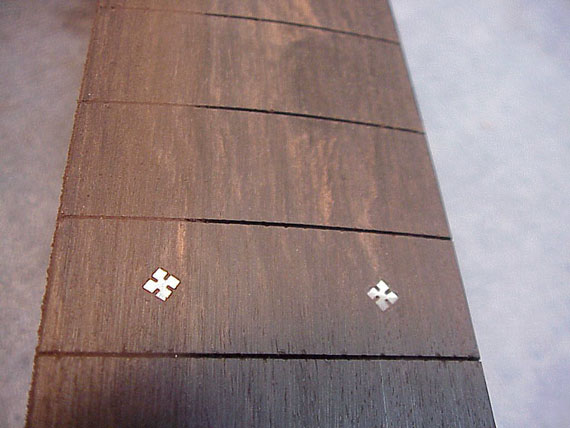
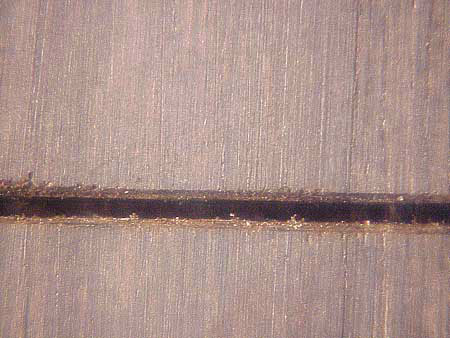
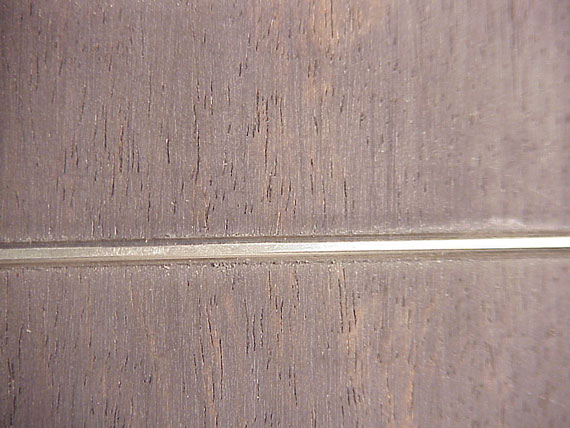
By the way, in some of the pictures, the ebony fingerboard looks very light, and the pores show clearly. That's just an artifact of my digital photography. In fact, this is a very black fingerboard.
Older instruments like this one may have pressed-in tuner bushings which can come loose and get lost during the process. A simple rubber band eliminates this concern.
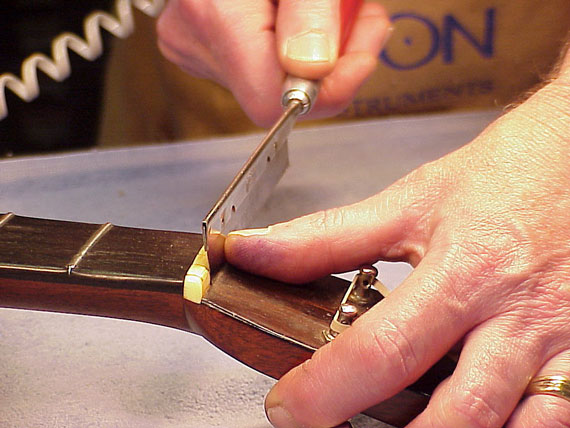
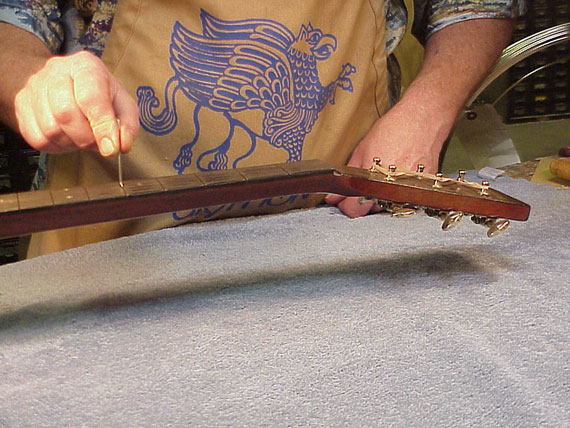
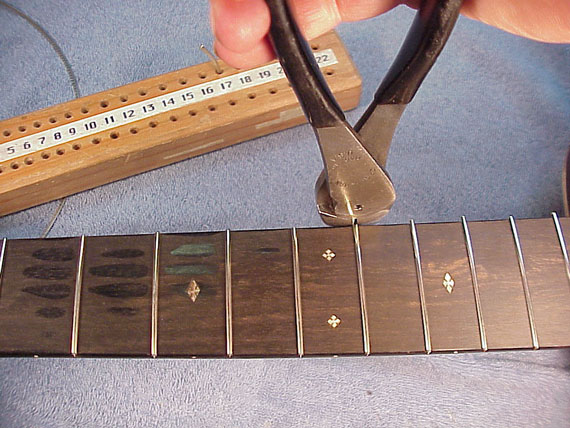
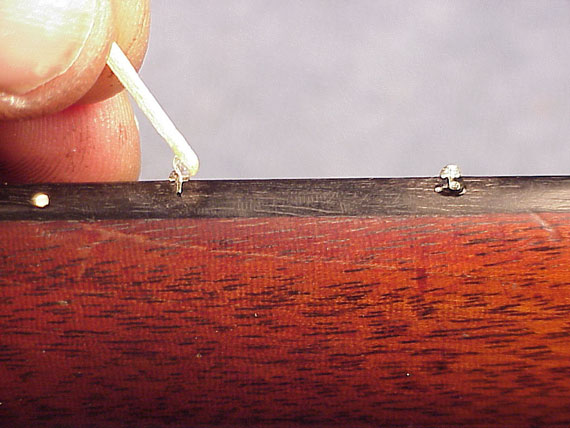
I'll make a little .010" cut behind the nut, to the depth of the nut to allow it to be dislodged without damaging either the finish or the peghead veneer.
A quick tap with a hammer will break loose even the most solidly glued nut. If I hadn't made that little cut behind, I might crack the base of the nut itself.
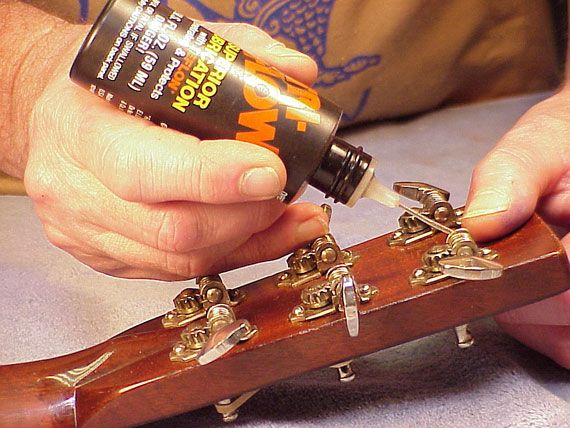
This is a good opportunity to check out the tuners, and lubricate them, so I don't forget that important step later. I'll remove and lubricate the truss rod adjusting nut, if it's possible.
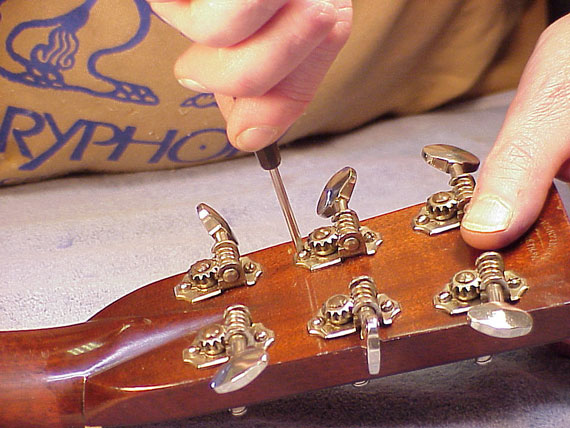
I also like to tighten or check the mounting screws and troubleshoot any other tuner difficulties before I start. If the guitar has an adjustable rod, I'll loosen it all the way, then tighten it slightly, so I'll have a bit of adjustment in either direction after the job is done.
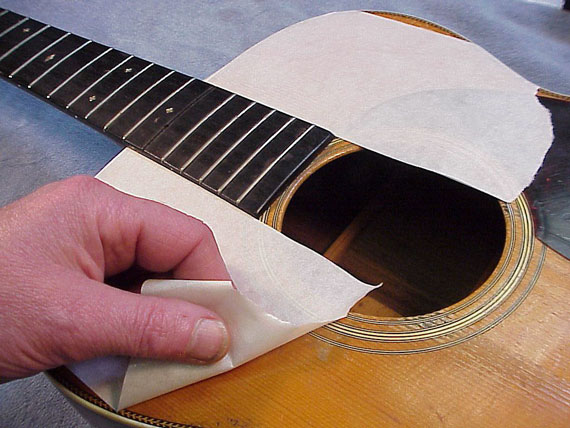
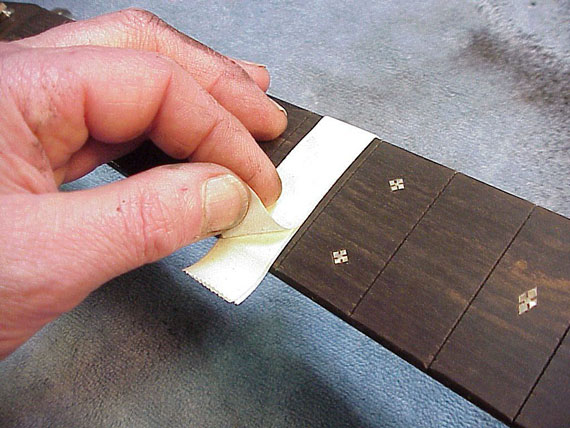
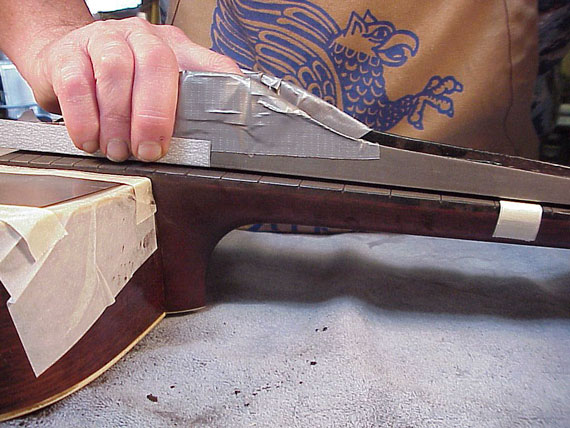
I like this wide low tack sign makers "transfer tape" for protecting the finish. It lies right on the finish and doesn't lift any finish when I remove it.
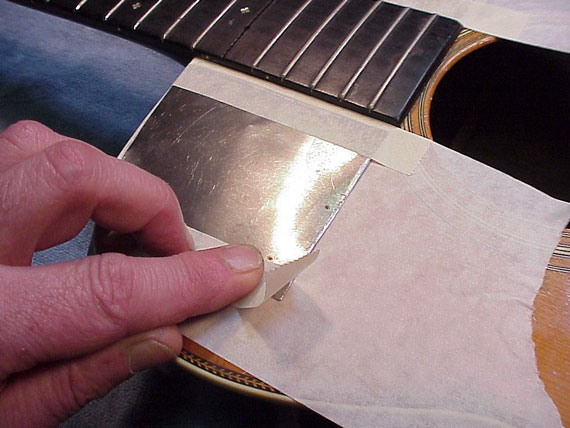
Over that wide tape, I'll tape on a couple of .005" thick guards I've cut from steel shim stock. That's so I won't scar the top if I slip with a saw or other sharpie.
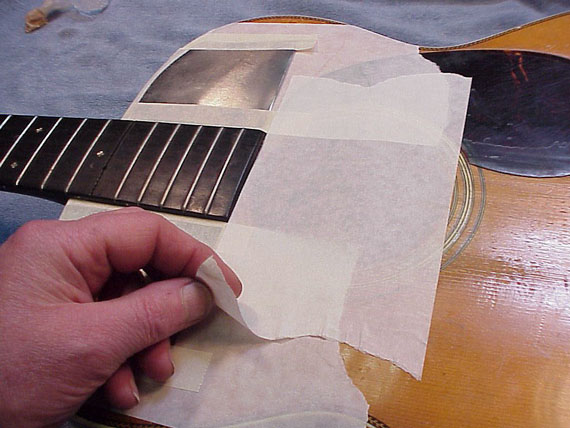
Before sanding, I'll also cover the soundhole to keep the dust out.
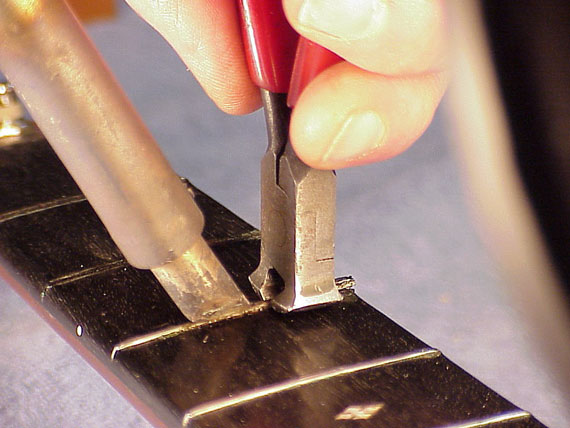
I like this 80 watt Weller soldering iron for fret removal. I have the tip filed to a chisel point with a groove in it so it won't slip off the fret.
Using my flush cutting fret puller, I keep the heat on the fret as I pull it out. I'm not pulling so much as "biting" under the fret, wedging it upward as the jaws slide under the fret crown.
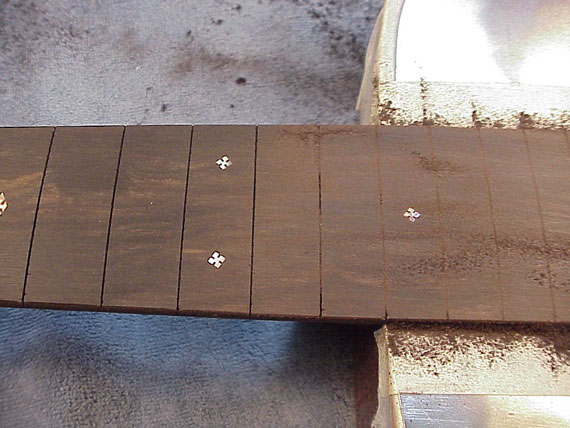
This is the way it should look. All the frets came out without chipping the fingerboard.
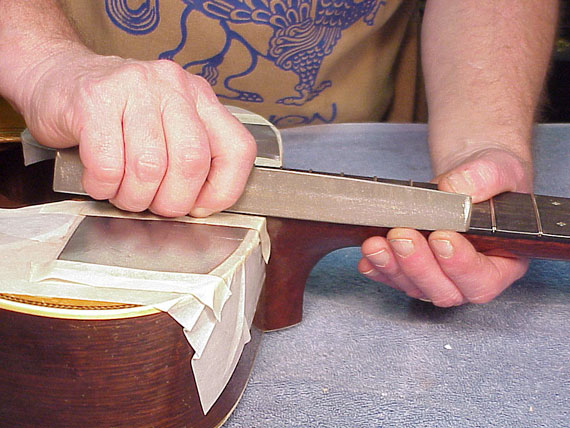
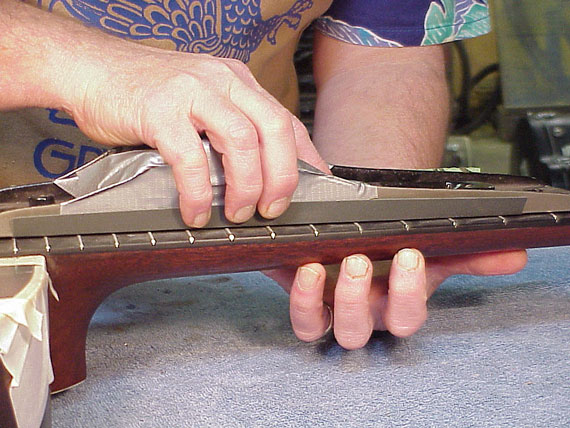
Time to sand the fingerboard to level and clean it up. Notice how I'm supporting the neck. I have my forearm and elbow on the bench and I'm holding the neck as broadly underneath as I can, raising the peghead off the bench. That way I won't tend to bend the neck as I sand.
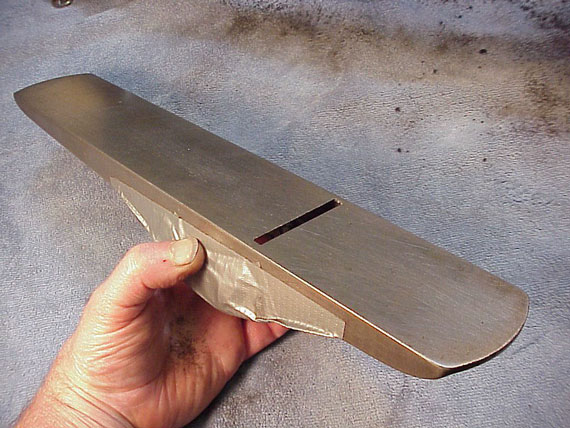
Here's my favorite, and only, neck sanding block. It is a Stanley #5 jack plane with all the guts removed. I's solid, flat, heavy and relentless as it glides along, cutting off anything that sticks up too high!
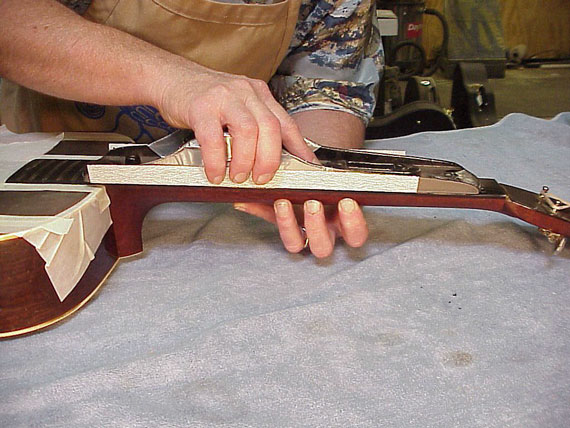
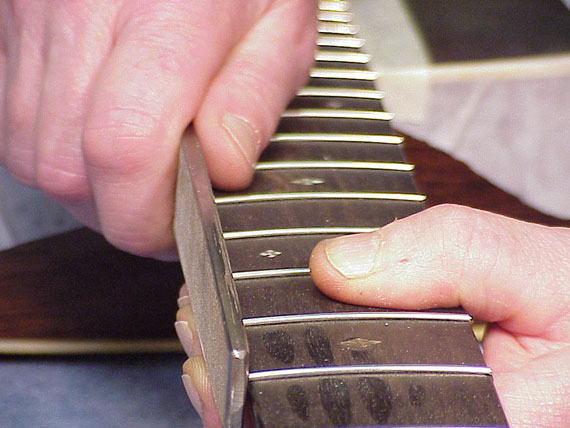
As I sand the fingerboard, I'm careful to "rock" from side to side a bit to preserve the original radius. I've tried using a radius sanding block, but I find it too hard to keep the block perfectly aligned, so I tend to get a slight unevenness at the edges of the fingerboard.
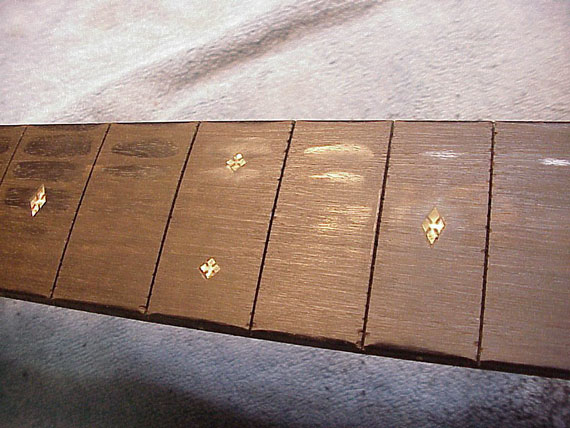
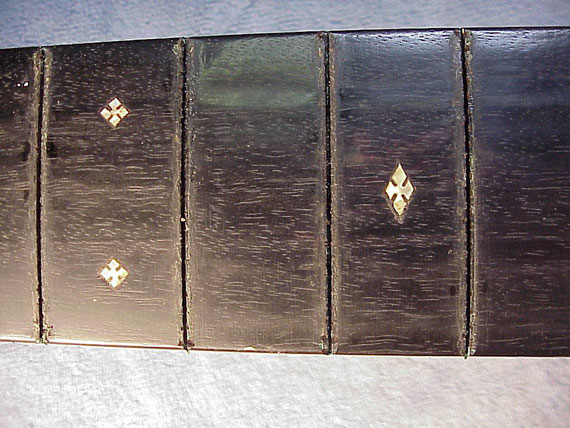
It's easy to see where I haven't sanded yet. The deepest of those fingernail wear divots will remain after the job is done. I don't want to compromise the thickness of the fingerboard just to sand through a bit of cosmetic wear. Some folks prefer to fill these spots, but I think they look better just left as they are.
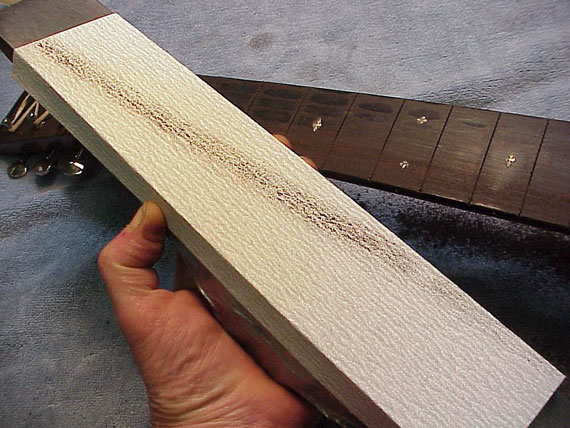
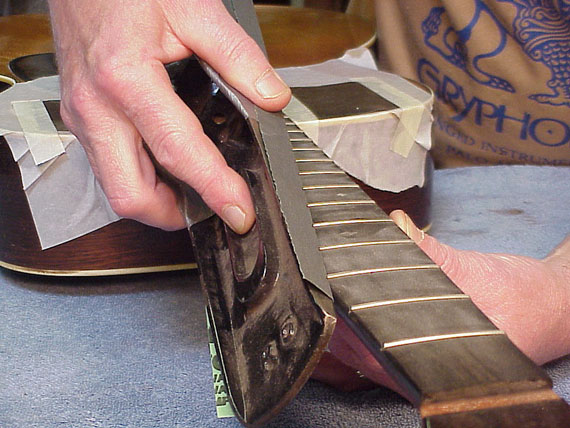
As I'm sanding along, I try to keep the sanding block parallel to the neck, but, as you can see in this photo, even if I do hold it at an angle, it will always still track a straight line.
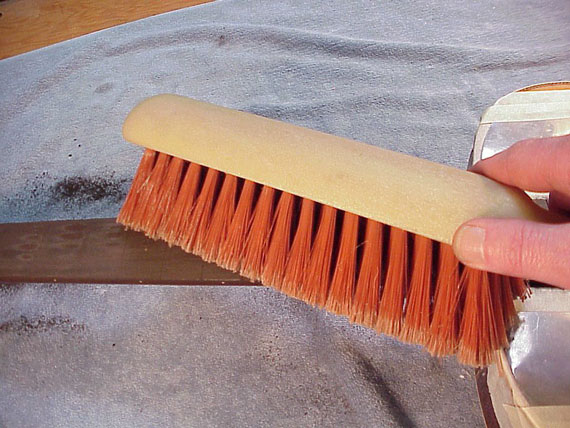
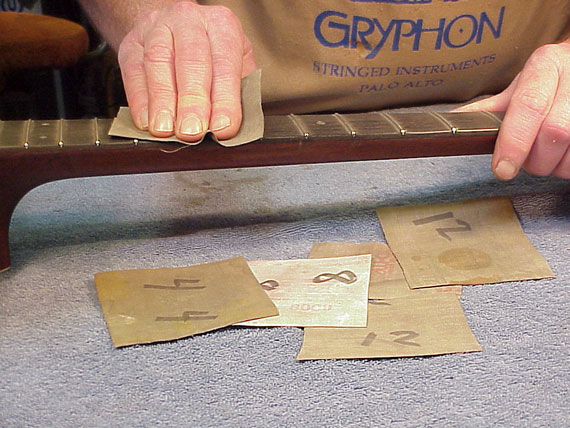
Between grits, I brush out the slots. I'll generally start with 100 grit and proceed through all the available grades to 320 for the finest shine on ebony, and to about 220 for rosewood.
As I sand, the clean slots give me an easy view of where I'm cutting.
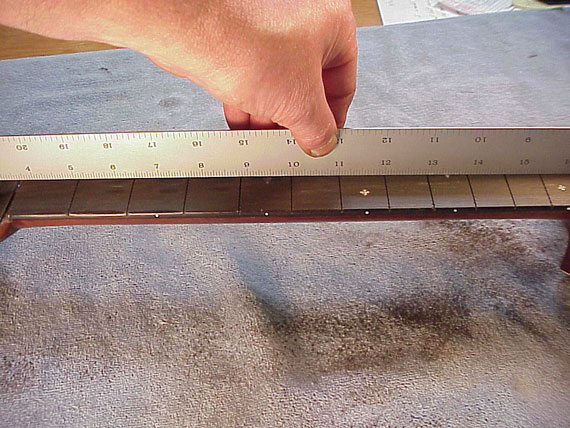
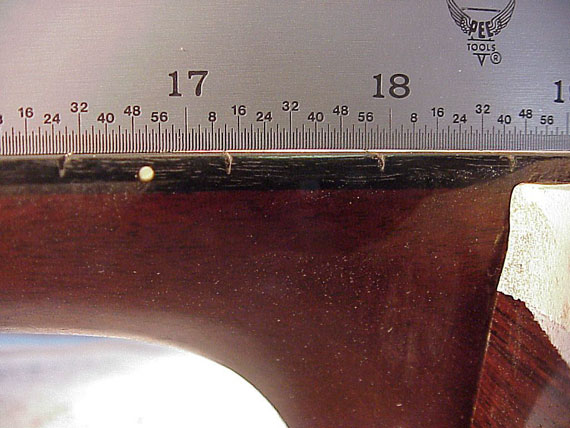
My goal is to get the fingerboard straight and level from the nut to the body. I'll check that with a straightedge, of course.
Once the surface of the fingerboard is perfectly straight, I'll place 5 layers of masking tape at the 6th fret.
Then, sanding with 1/2 sheets, I can guide the long plane body against the tape platform to create a drop-off over the body. I'd like the end of the fingerboard to drop .015-.020" lower at the 20th fret. That will help compensate for the natural tendency of the neck to pull forward under string tension.
Here, you can see that my sanding is only from the 12th fret up to the end of the fingerboard.
And, when I'm finished, the drop-off starts about two frets outboard from the body. I find it helps to avoid that little hump at the body as the guitar ages and the neck inevitably pulls forward a little.
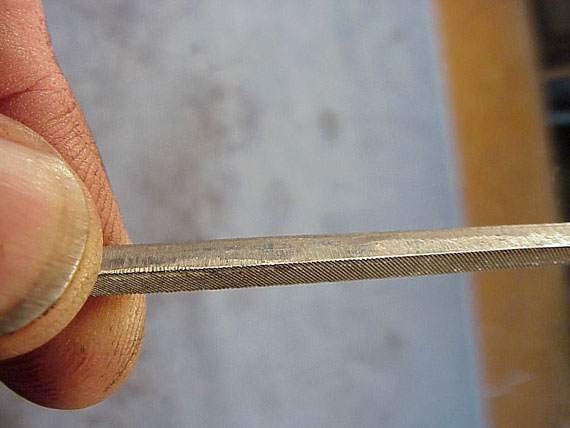
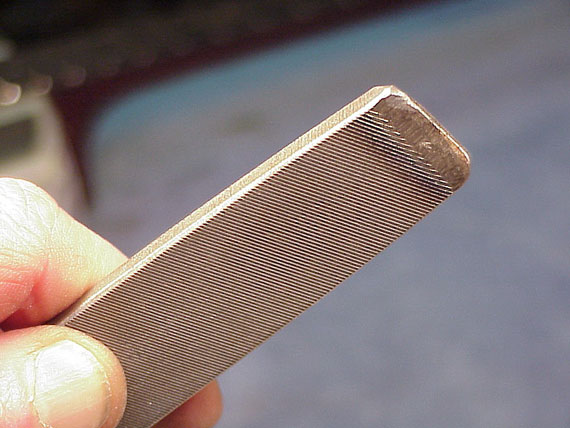
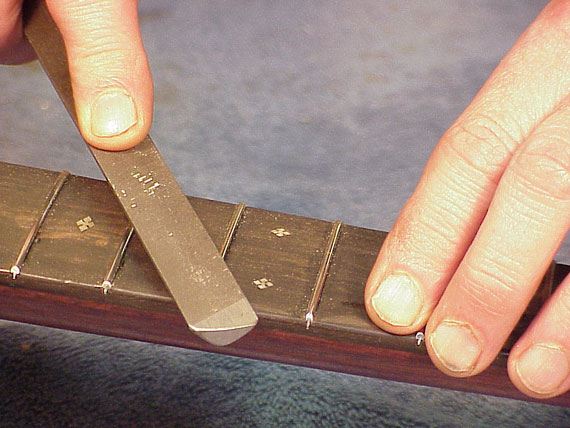
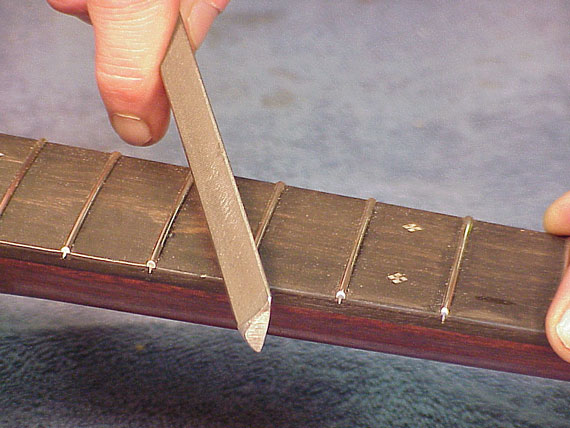
This is a little triangular file. I think it's called something like "double extra slim." Anyway, it's the narrowest taper I could find in a 6" file. I ground one whole face flat and safe, so the resulting corners would be extra sharp.
That way, when I lay the file in a fret slot to bevel the corners, it doesn't tend to slip out. I can only file one side at a time, but it takes almost no time at all, with one quick stroke on each slot.
See? Two nice little bevels. They may help the fret go in and seat nicely, and will reduce the tendency to chip when the fret is pulled out next time.
Next, a quick trip through the fret slots to clean them and deepen just a bit, if necessary.
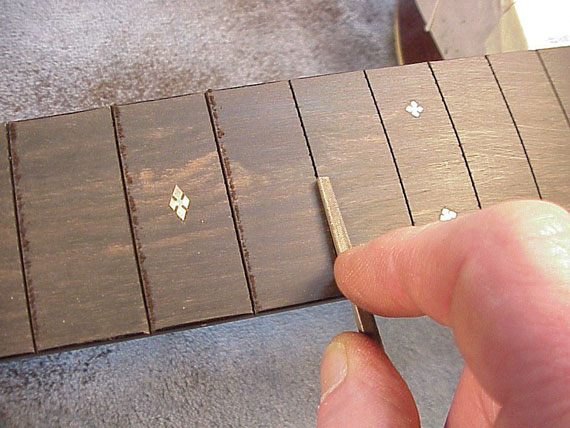
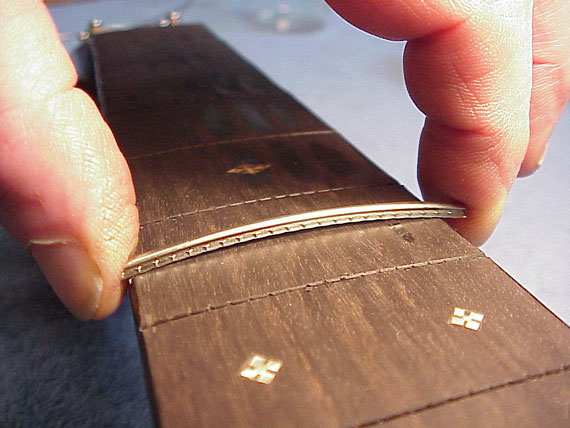
I bend a little dogleg on a piece of fret wire to try it for size. I don't find it all that easy to measure frets and slots, so I just try my various fret candidates until I get a good fit.
My ideal fit is when the fret is relatively easy to tap in, and when I lift it like this, it just barely holds the weight of the neck.
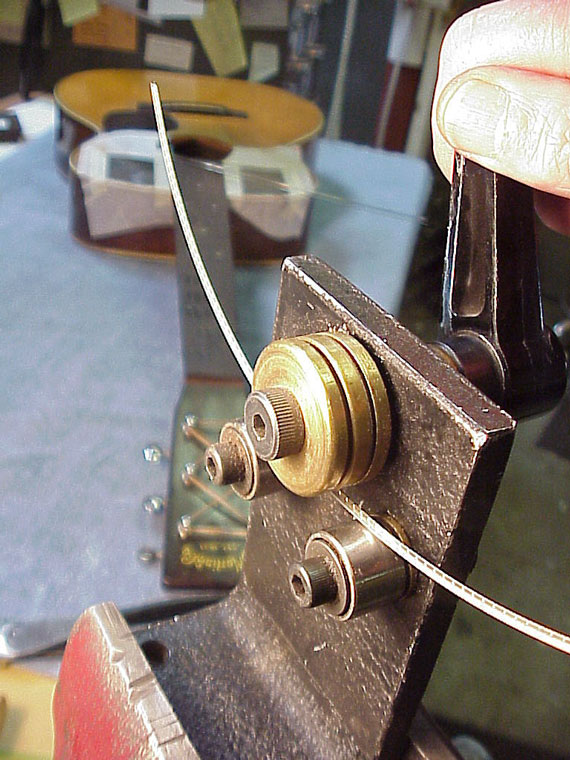
I want to have my fret wire coiled in a slightly tighter radius than the radius of the fingerboard, so I'll run it through the Stewart MacDonald fret radius adjusting rollers.
This is the way my frets usually look. With the extra curvature, the ends of the frets are likely to stay in place.
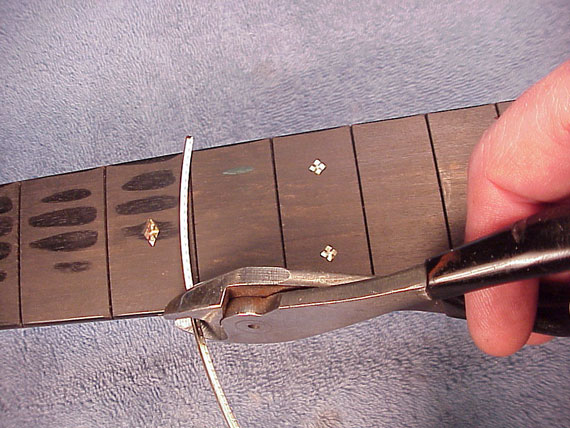
I cut them to about 1/4" over length.
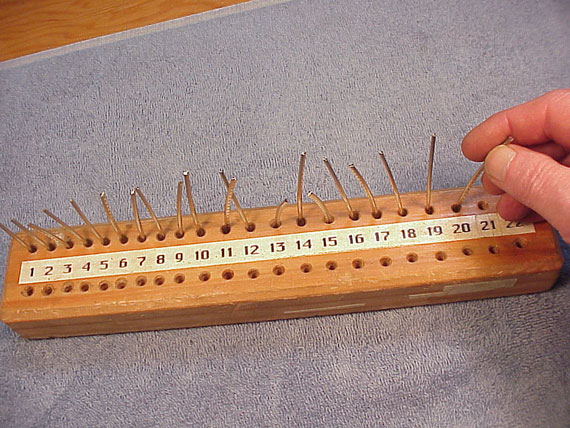
And store them in this little block. I have two rows of holes, so that in the unlikely event I've cut a full set of frets I determine won't be usable, I can save them neatly for another job while I use the other set of holes.
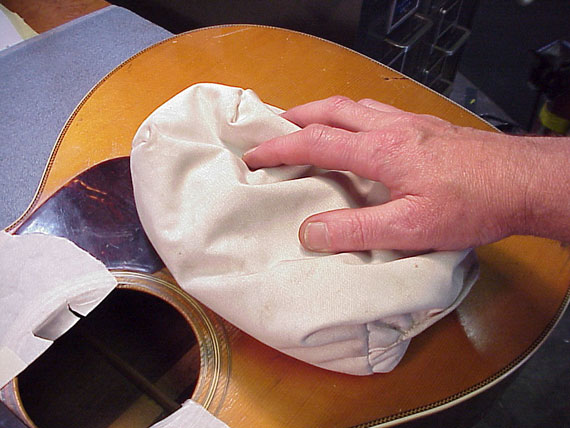
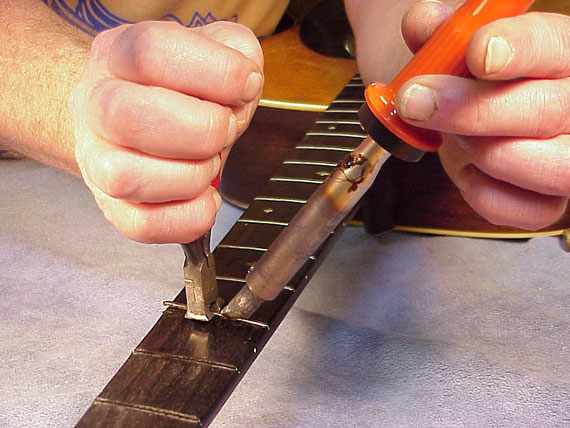
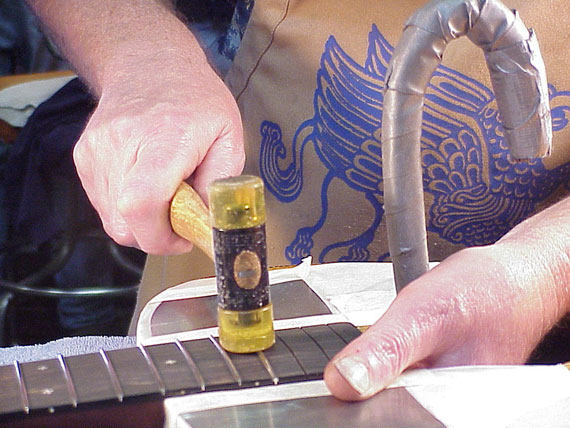
I lay a sandbag on top of the guitar to keep vibration down a bit.
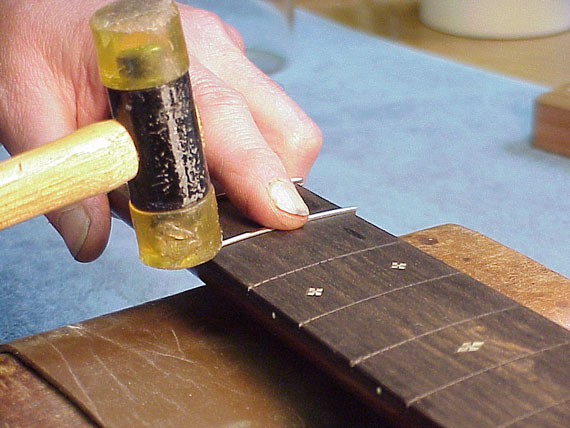
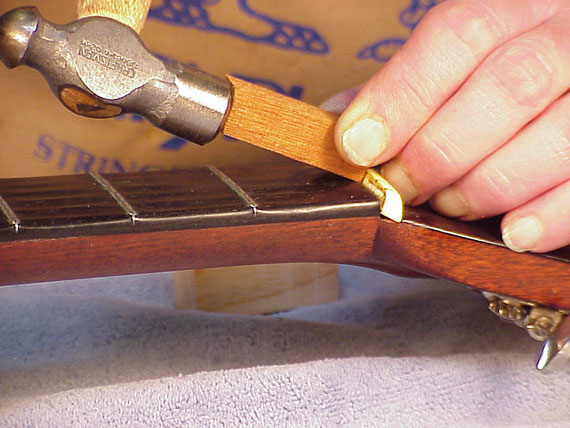
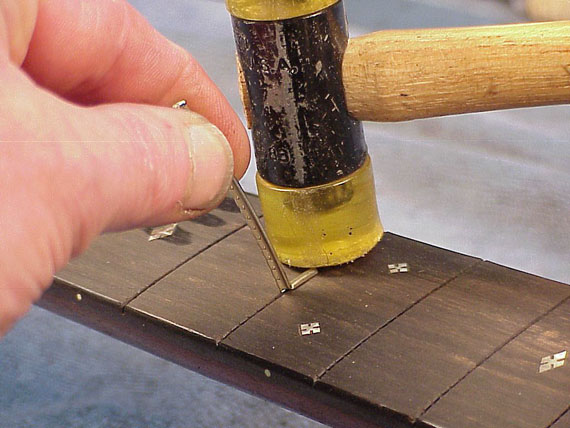
Balancing the fret with one finger, I tap it in place at the ends first, then work inward. I like to use 30-40 rapid, sharp, light blows to seat the fret, slowly increasing the strength of the blows as the fret goes in.
My leather covered 4 x 4 is sufficient neck support for the tapping operation. Notice how I'm holding the hammer. With the handle parallel to the fret, it's unlikely I'd dent the fret with my hammer. I use almost all wrist action to snap the hammer downward sharply.
After I have all the frets tapped in place up to the body, and over the neck block, I trim the ends to avoid getting cut as I handle the guitar.

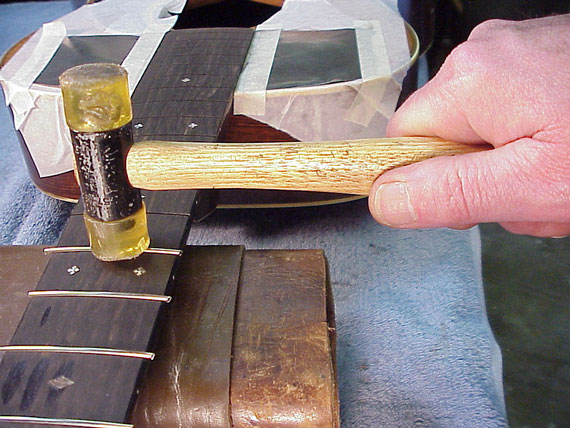
Out over the body, there's no internal support for my hammer blows, so I have this lead ballast weight I made by pouring hot lead into a mold around a bent steel handle.
Holding the ballast inside and directly under the fret in question, I can tap as hard as I want without damaging the instrument, and I can seat the frets as neatly.

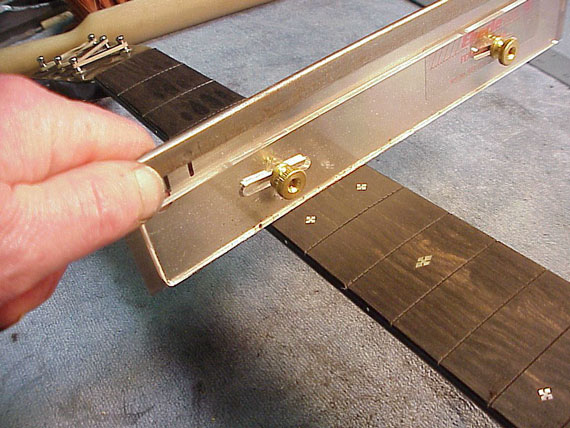
After all the frets are in place, I'll check for high ones, and give them a little more attention. This is a cool little straightedge sold by L.M.I. that bridges any three frets up and down the neck to reveal uneven ones.
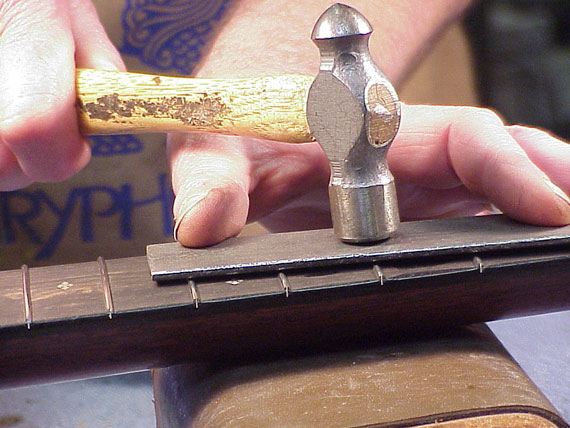
Even if I don't see any high, unseated frets, I'll "iron" them anyway. I have this little 3/32" thick piece of steel to protect them from my steel hammer blows, and I simply rap them all good and hard to make sure they're well seated.
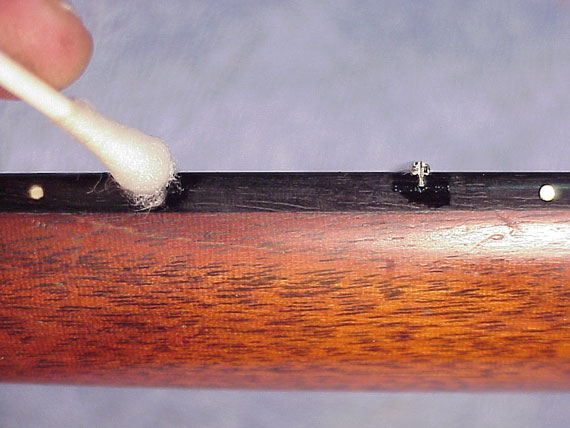
A quick dab of cyanoacrylate catalyst on each fret end will help my filling job go more easily.
My filler is simply clear medium viscosity cyanoacrylate dropped into each fret slot end. It's dark down in there, so the clear filler appears nice and dark when the job's done.
For trimming fret ends, I've ground the edges to rounded safe surfaces, and the ends to a slight taper on this 10" mill bastard file.
As I'm filing the edges flush and beveling them, notice that I'm supporting the file on the fingertips of both hands as I glide along the edge of the fingerboard.
My first strokes are nearly vertical as I trim the ends flush to the edge of the fingerboard.
Then, I'll continue filing, and roll the file over to 60 or 45 degrees, depending on the shape I want for the ends of the frets.
Here's the fret end, trimmed and beveled.
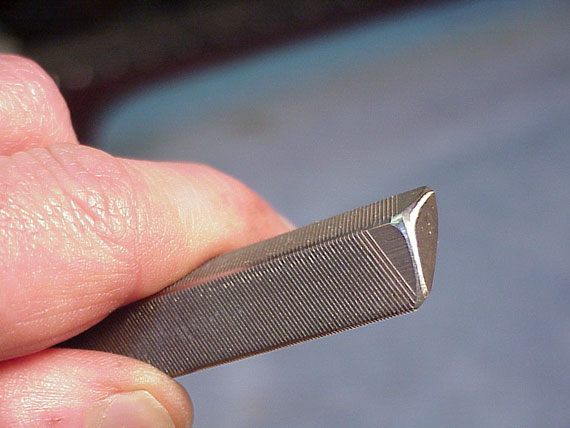
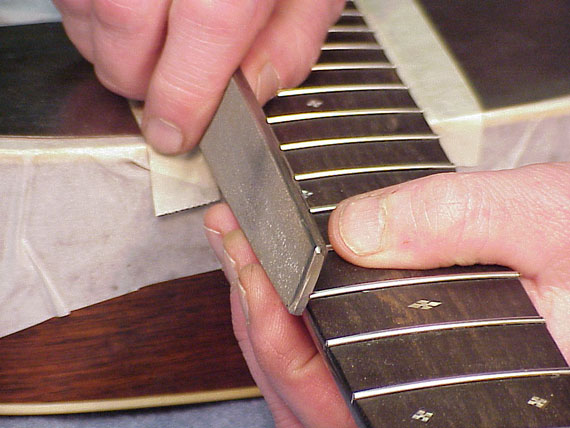
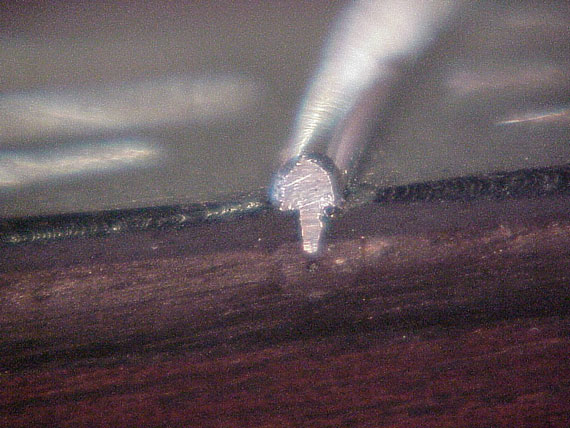
This file is called a "cant saw" file. It has corners that are just over 90 degrees and just under 45 degrees. I've ground all the corners safe to avoid scratching the fingerboard.
Using the 90+ corner, I file a bevel on each fret end. I try to hold the file at exactly the same angle as I work up and down the fingerboard, giving each fret the same single, measured, solid stroke.
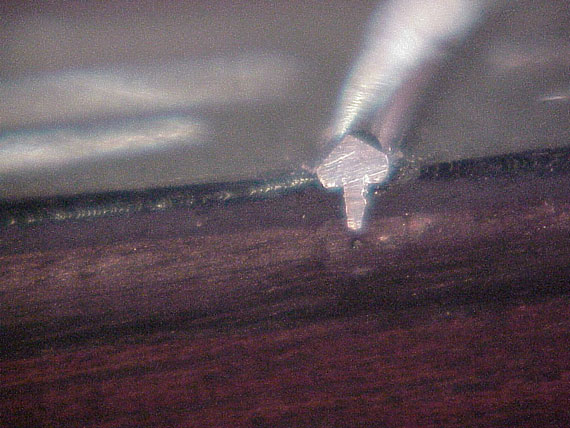
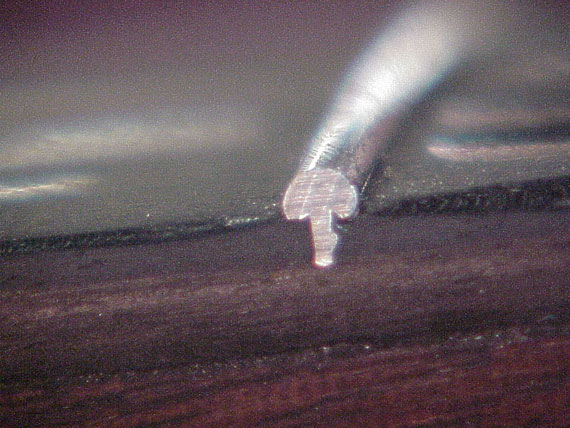
The result is a sort of diamond shaped pointy fret end. Some luthiers really prize the sharp look of this kind of fret end, but I find it a bit harsh on the the old left hand.
So, I take the same file, and "break" the inside lower corner of each fret to avoid that little sharp feeling down there.
Now, you can see the results of each of these little file strokes.
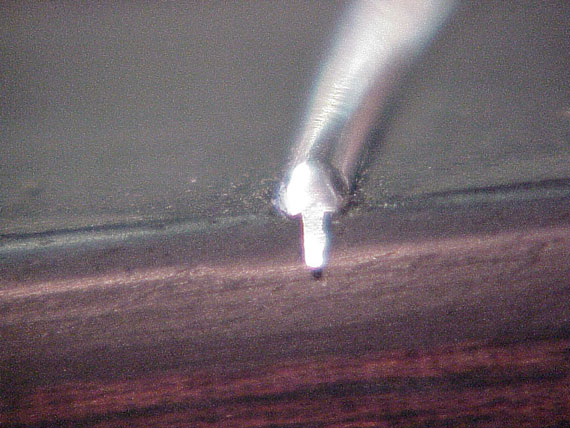
Jumping ahead a bit, here's the way the fret end looks after I've rounded it over in the steps that follow. Nice and smooth to the touch.
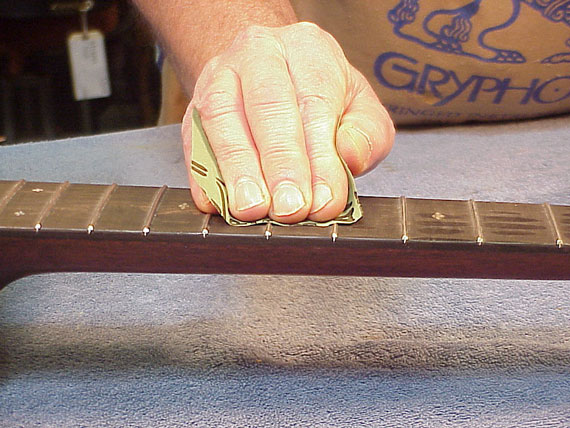
Once the ends are treated, I turn to leveling and rounding the frets. My same old plane body works perfectly for leveling, with some 600 grit waterproof silicon carbide paper. I sand with a circular motion at first to avoid snagging the ends of the sandpaper.
And, just kiss the ends of the frets and the edge of the fingerboard to remove any little file chatter marks.
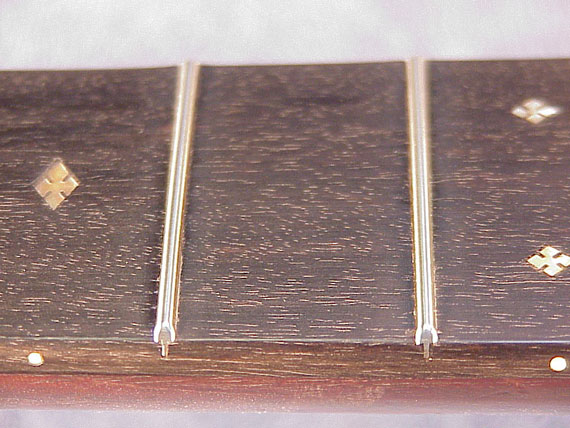
If all works out well, each fret will have a little flat strip on the top, like this.
If I've done my preparation well, and have the frets nicely seated, rounding off that little flat spot is no big deal. I can sand with the same 600 grit paper, bumping up and down the fingerboard, using only my fingers to back the paper.
I follow up with a similar sanding, using all the Micro Mesh grit cloths in sequence: 2400, 3200, 3600, 4000, 6000, 8000, 12000. It may seem like overkill to use all the grits, but it takes so little time, and I figure it couldn't hurt.
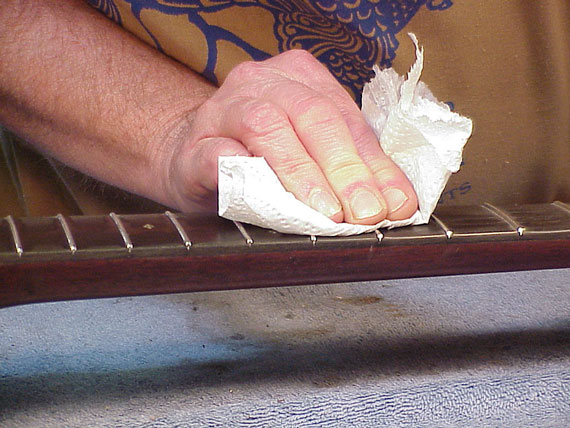
All that sanding and buffing mashes a lot of gray metal particles into the fingerboard, which I clean right up with naphtha on a rag.
I follow up with a bit of mineral oil to restore the luster and depth of shine. Now, the job is done, and it's time to string up, and hear what this baby has to say for itself!